Instructions: Rose
Kawasaki Rose with DofTNet Modifications
Before I begin, I would like to point out a few things. This is not the Kawasaki Rose diagrammed by Winson Chan or any of Toshikazu Kawasaki's more recent rose designs. This is much more closely related to the version found in Origami for the Connoisseur but with some modifications to accommodate my base design and my own sense of aesthetics. If you don't already own a copy of Origami for the Connoisseur you really should get one!
The whole process (including base and stem) can take an hour or more so make sure you have a little time on your hands.
Featured in the 2026 Convention book of Origami Deutschland!
If you found your way here from the QR Code in the convention book, Welcome! Thanks for visiting! The pictures are, indeed, bigger here... If you click on them 😉
Also I think my name got a bit lost in translation - In the convention book, I'm listed as Dan "DofTNet" Brovine. It ought to read Dan "of Toasters" Provine. DofT is short for Dan of Toasters, a name I started using back in the early 1990s. DofTNet is essentially short for "Dan of Toasters on the Internet" but functions as shorthand for the business entity that I operate my websites and servers under - DofTNet Enterprises. Just in case anyone was wondering.
In any case, I'm delighted to have been included!
Photos and descriptions ©2018 by DofTNet Enterprises is licensed under CC BY-SA 4.0
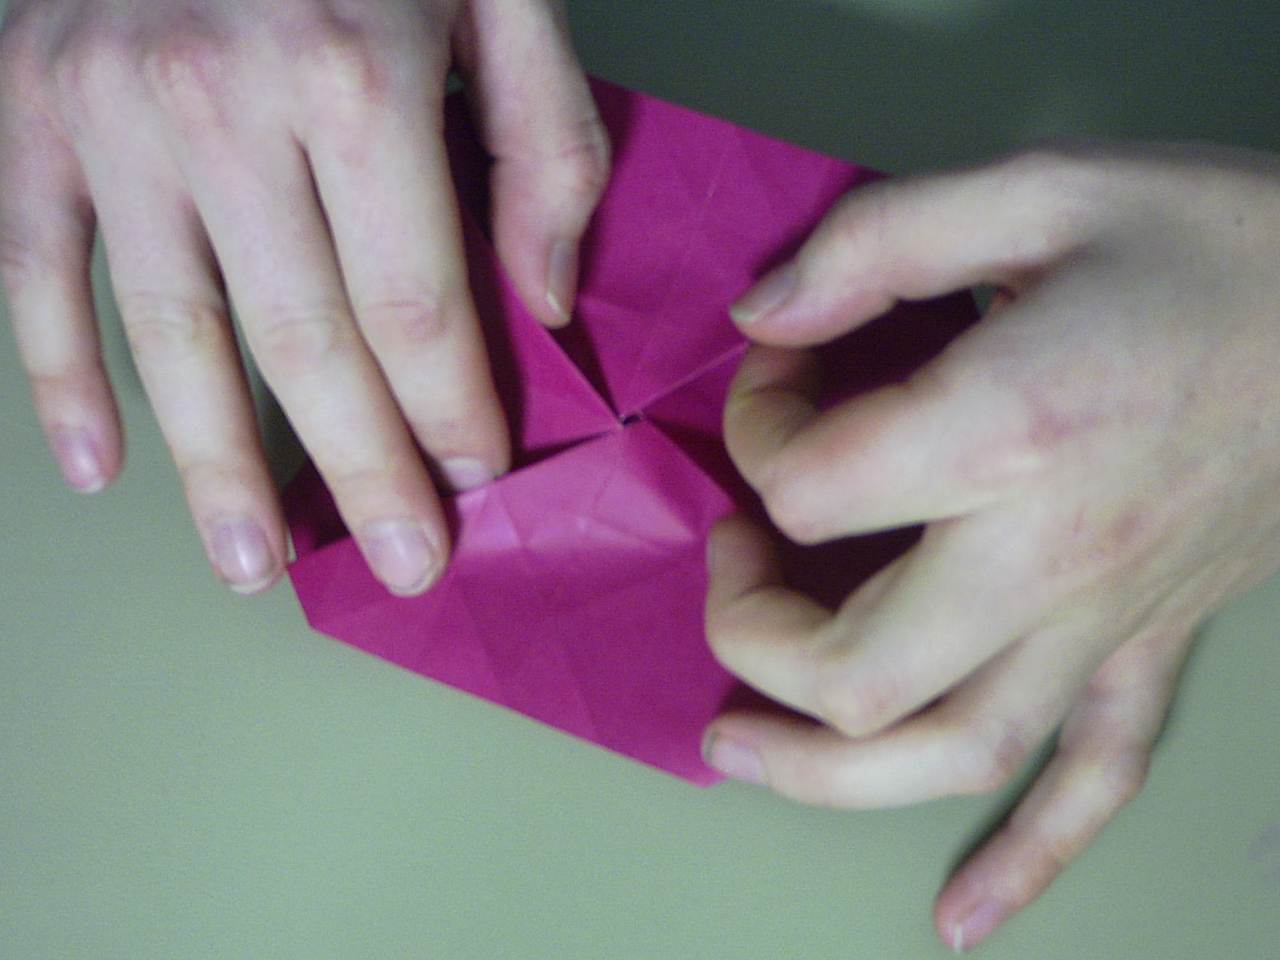
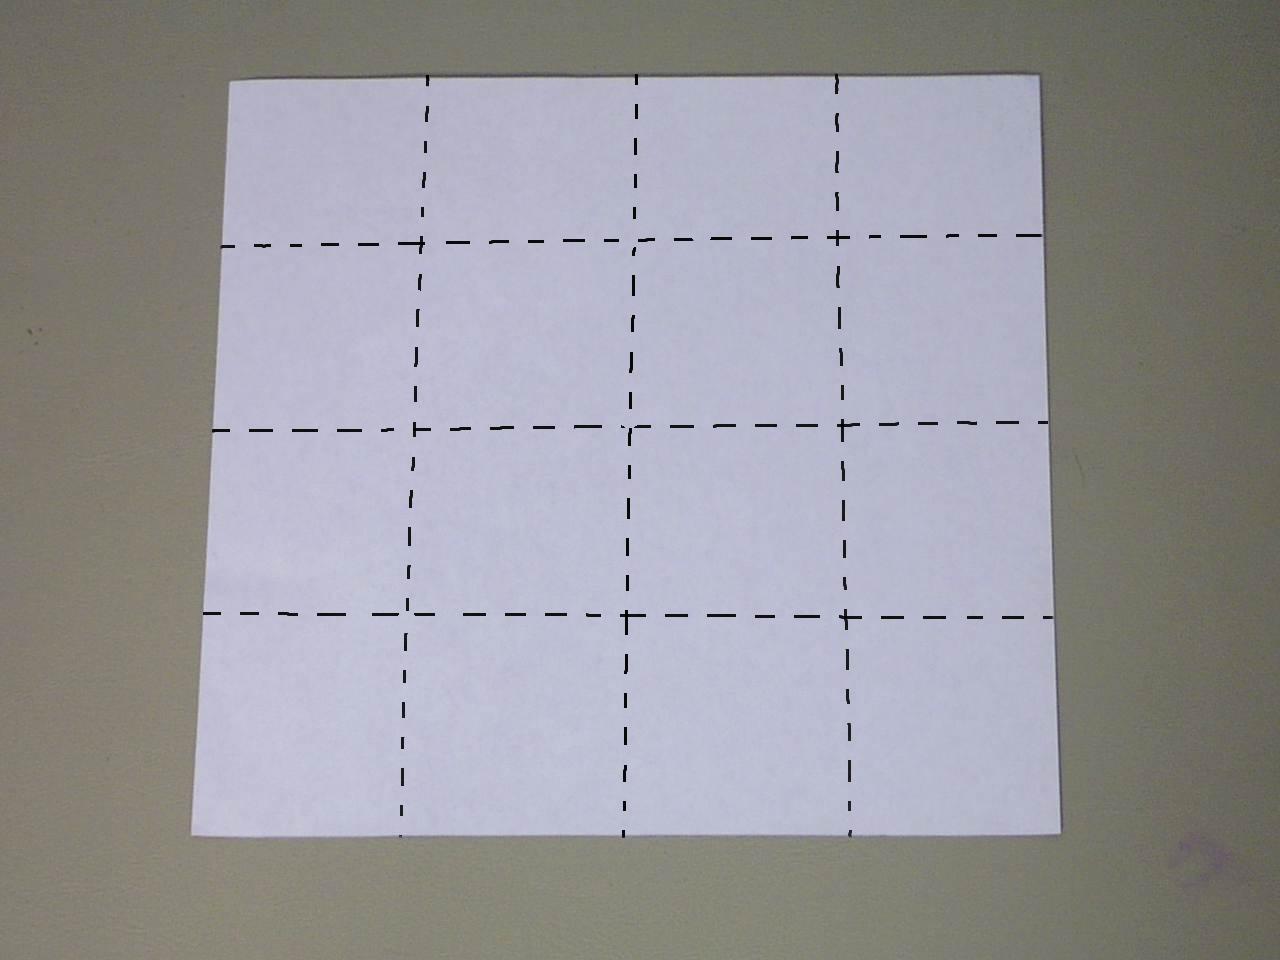 Step 1
Start with a square of paper with the colored side down. Fold the paper in half and fold each half in half in both directions as shown. Unfold.
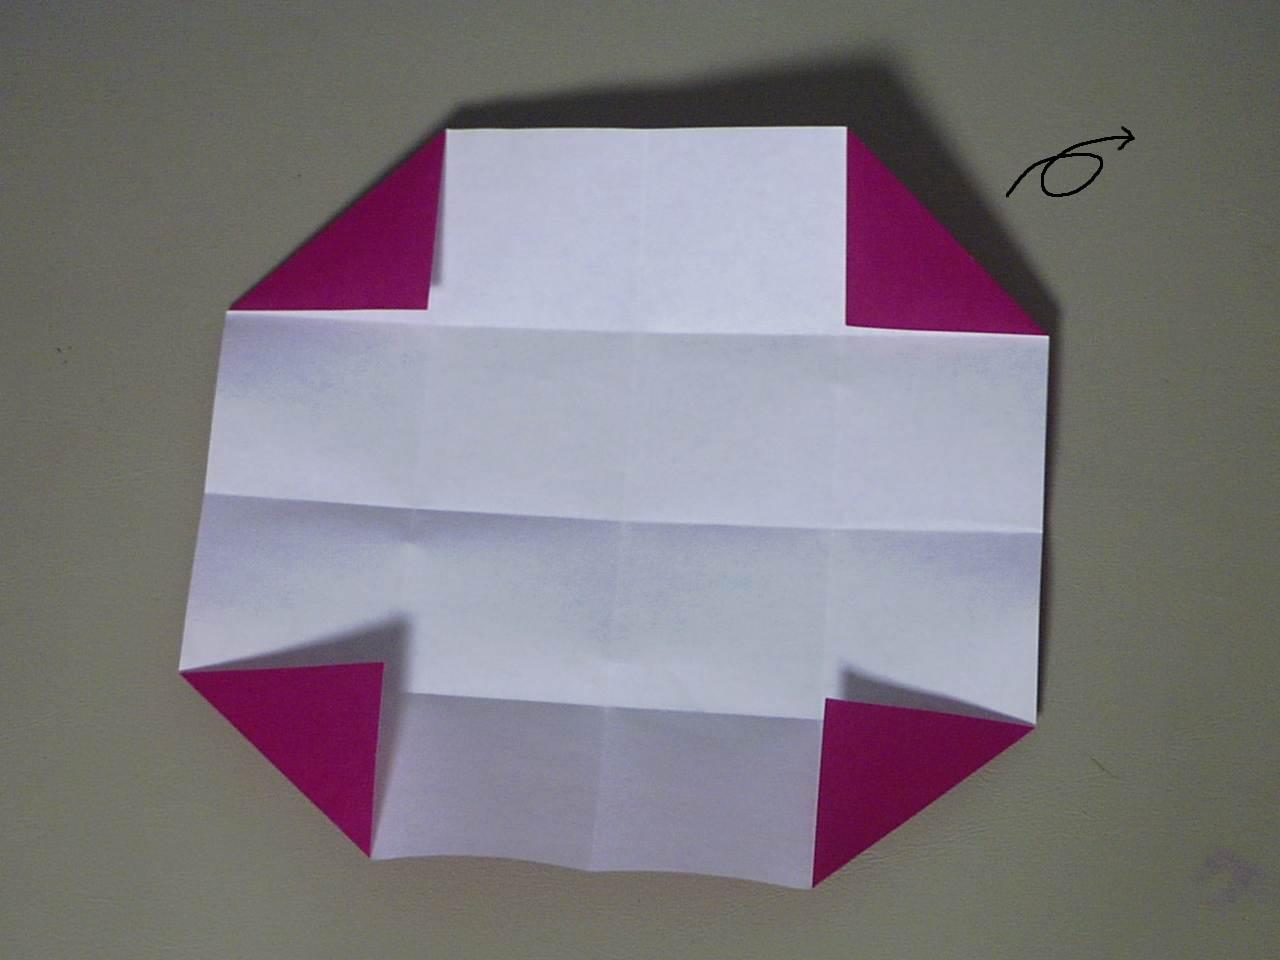
 Step 2
Fold the corners in as shown.
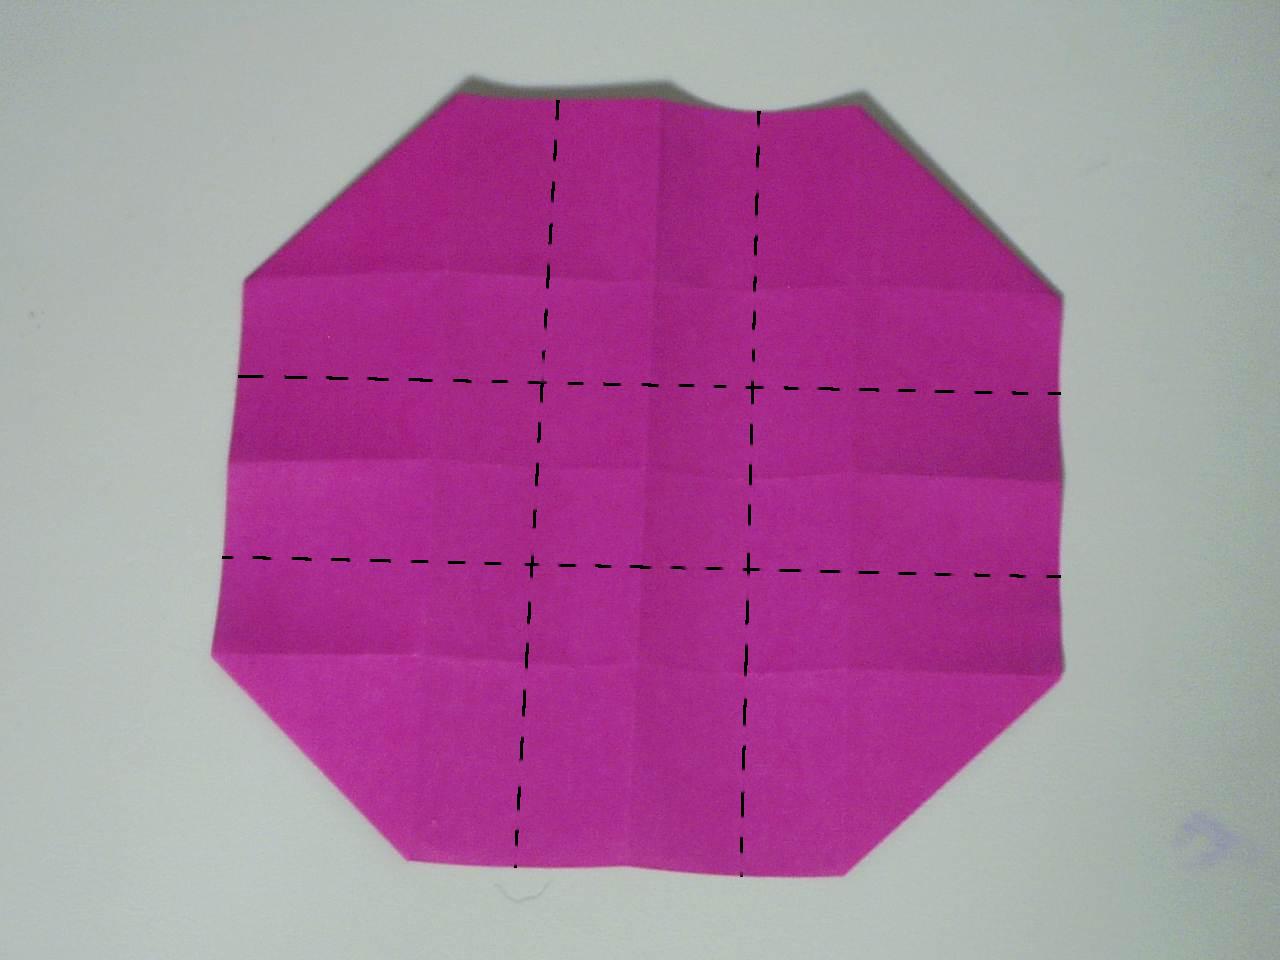
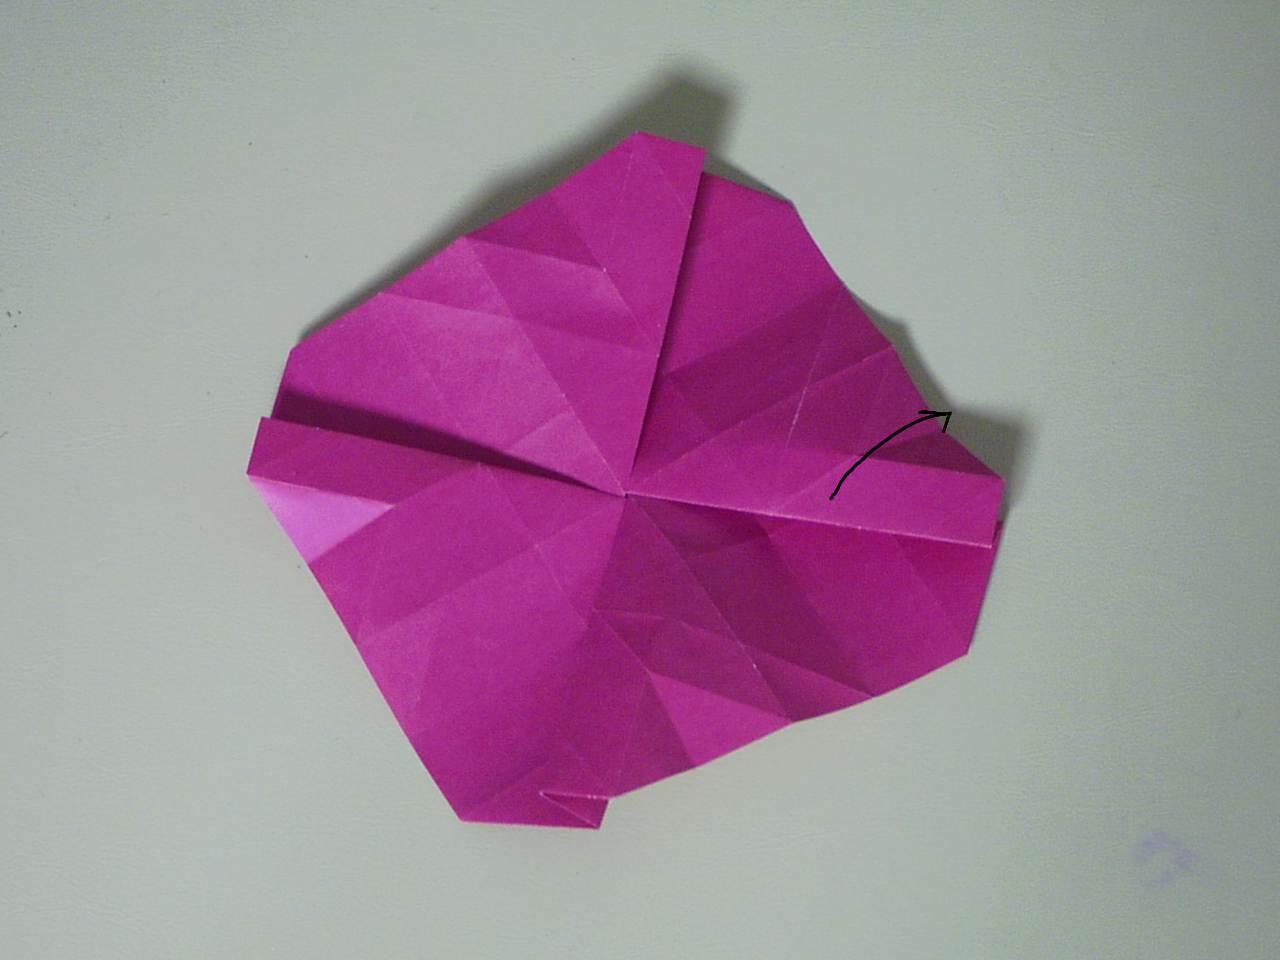
 Step 2 - Result
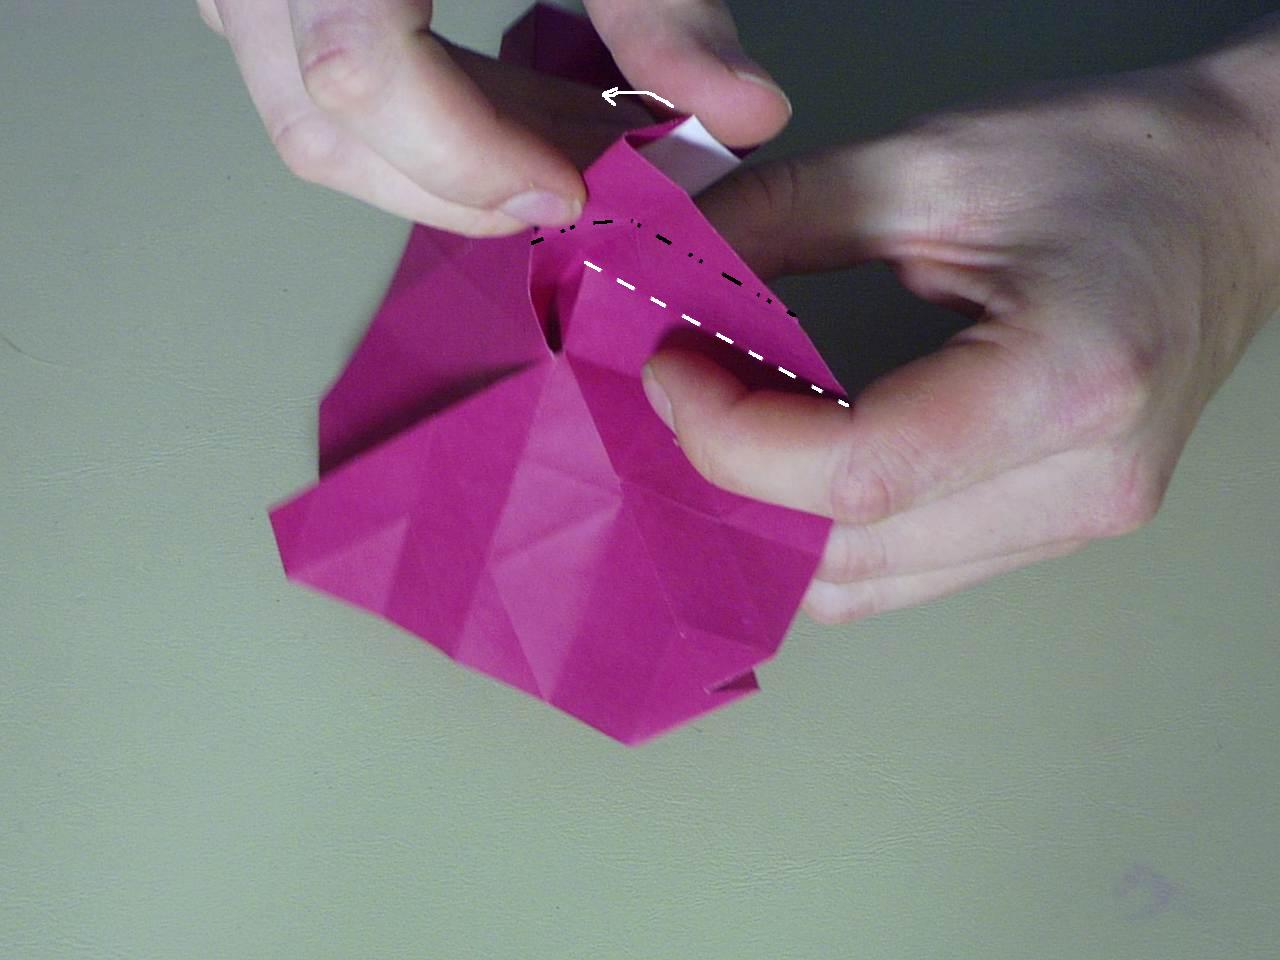
You should end up with this. Turn the paper over.
 Step 3
Valley fold each of the two center segments in half in each direction as shown.
 Doing Step 3
I find it's easiest to do this step by pinching the center crease and lining it up with each of the creases that it is between.
 Step 4
Next, we do basically the same thing we did in step 3 except on a smaller scale in the center square as shown.
 Doing Step 4
Again, it's easiest to pinch the center crease and fold it so that it lines up with the creases on each side of it.
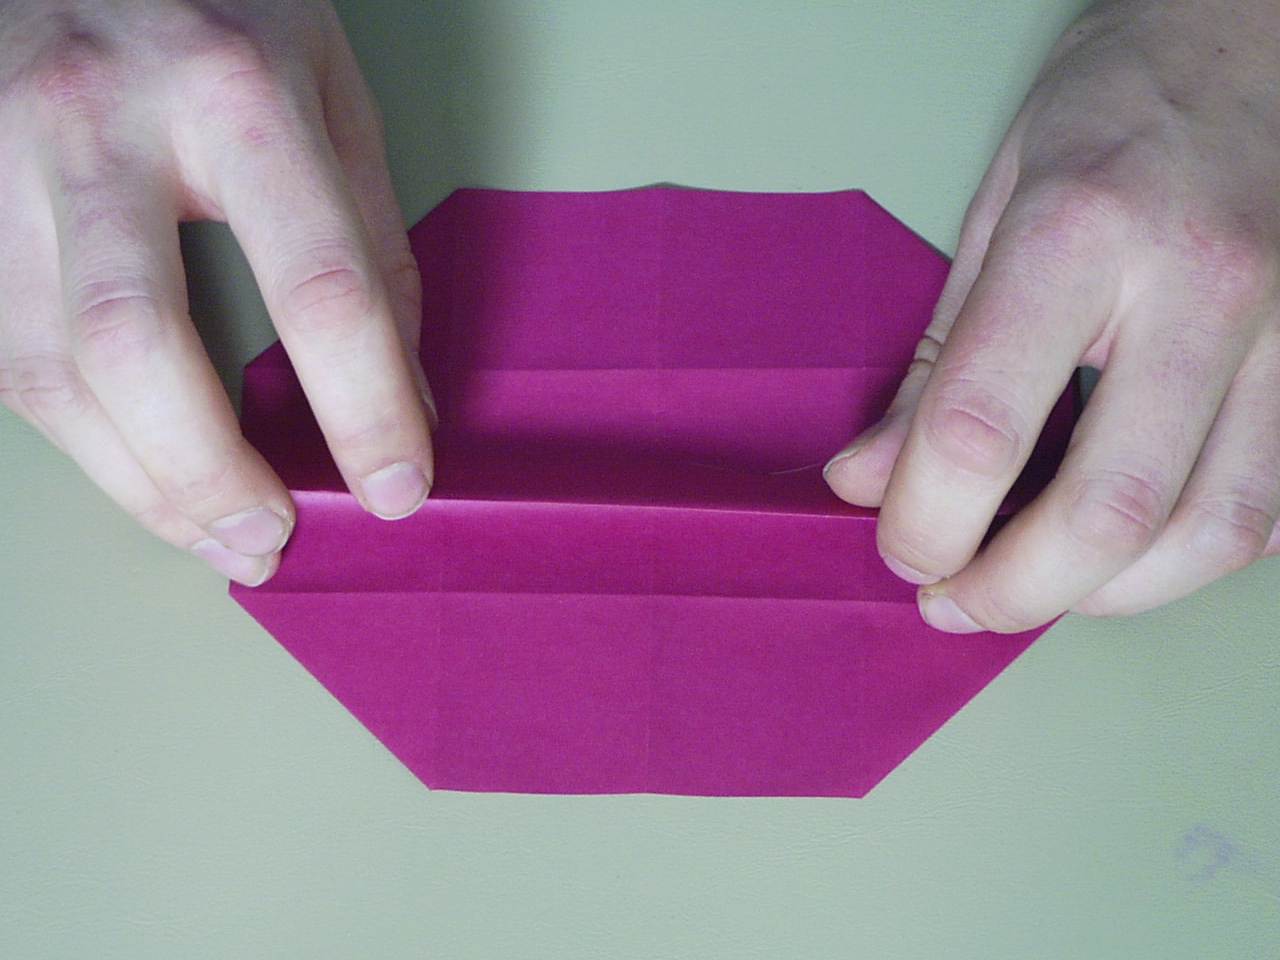
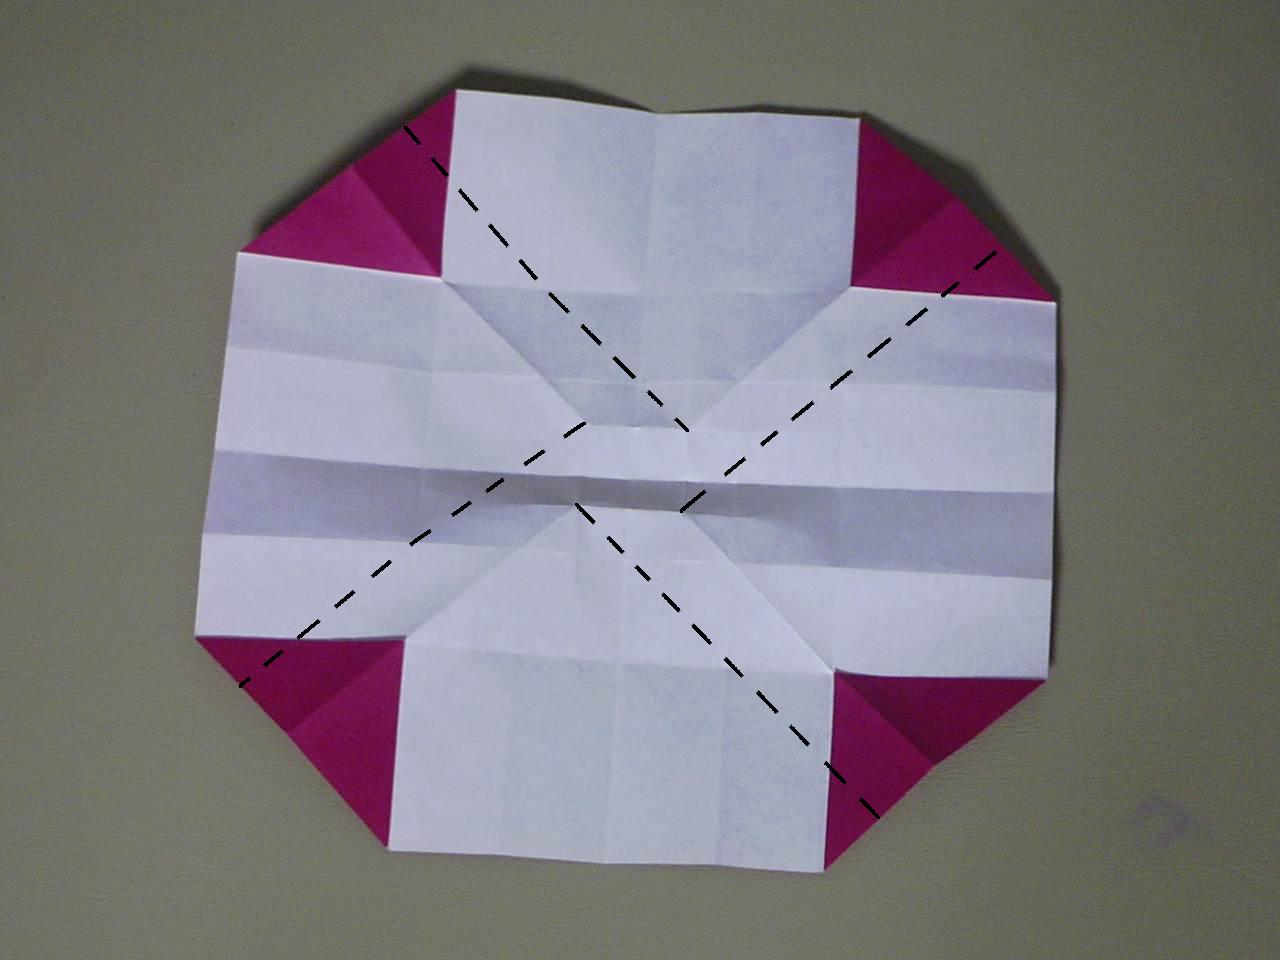
 Step 5
Valley fold the paper where indicated.
 Doing Step 5
I find this to be the easiest way to do step 5.
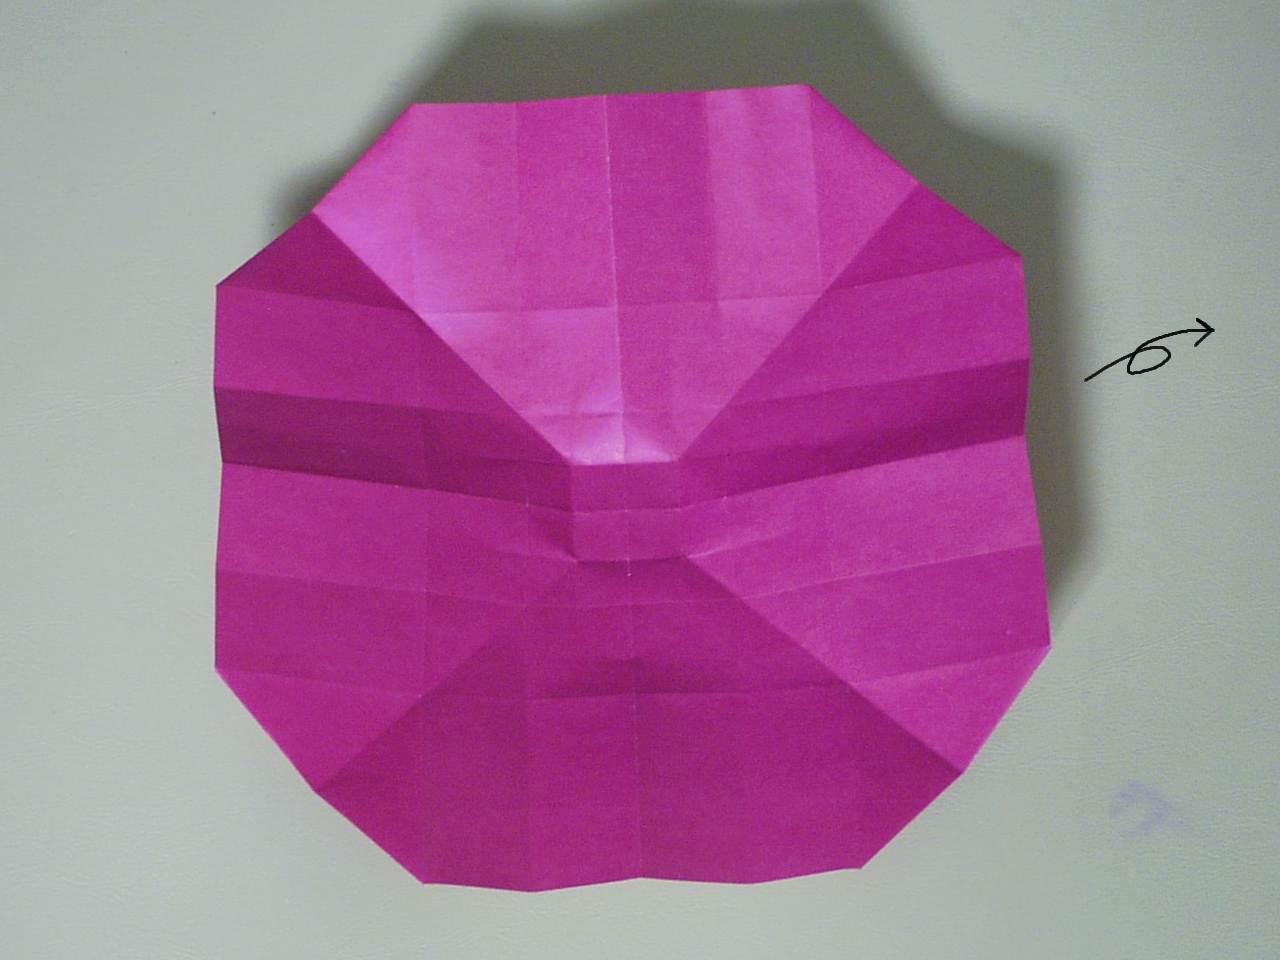 Step 5 - Result
This is what you should end up with once you have completed step 5. Turn the paper over.
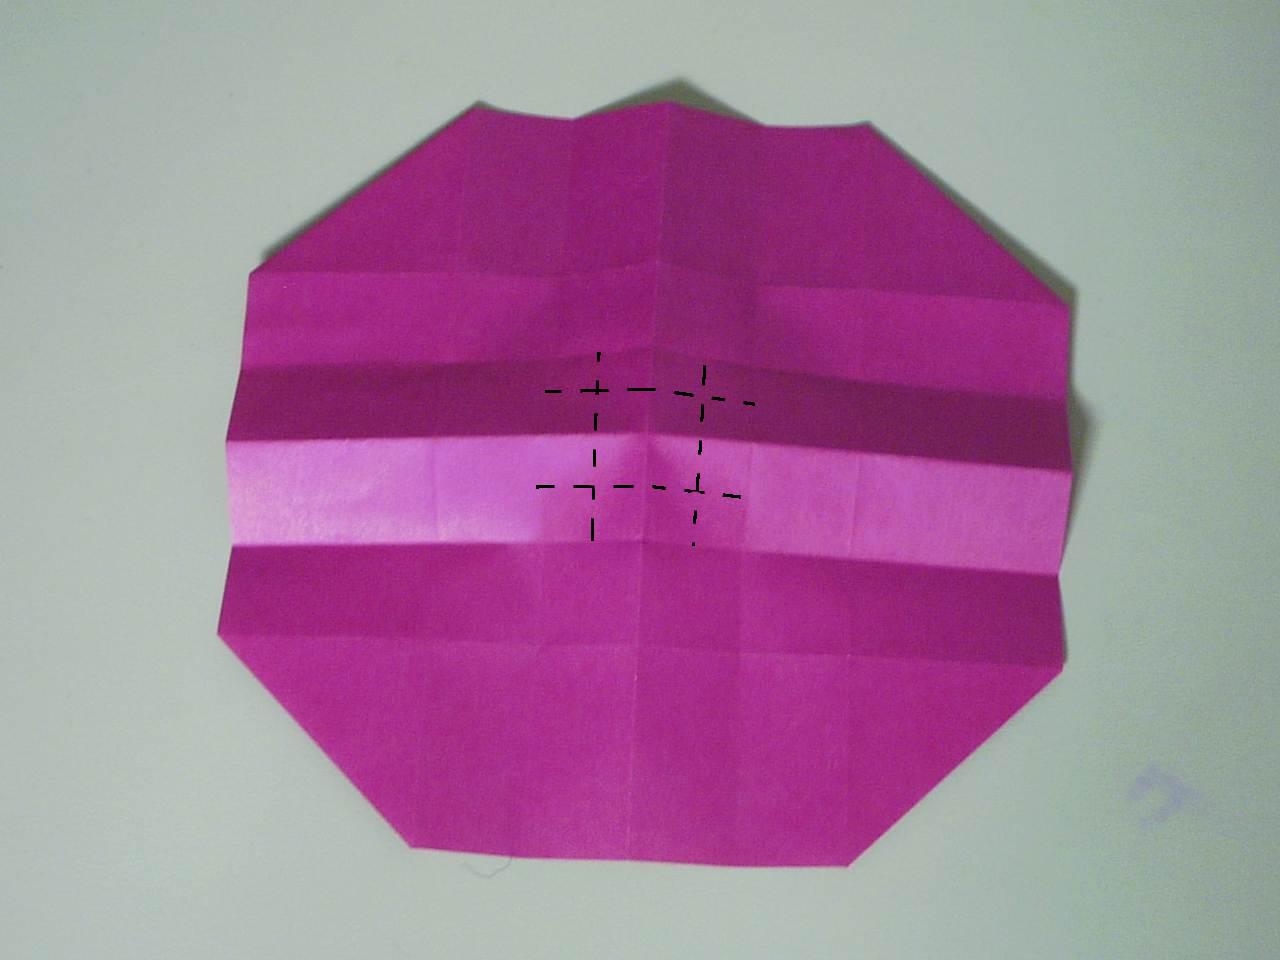
 Step 6
This step determines which direction the twist goes. As shown, valley fold from each corner of the small inner square parallel to the crease from step 5 that starts from the adjacent corner in the counter-clockwise direction. (did you get all that? just look at the picture if you didn't)
 Doing Step 6
Step 6 in action. Note that the edge of the crease from step 2 should just touch the point from the opposite corner (where my finger is pointing, you see?)
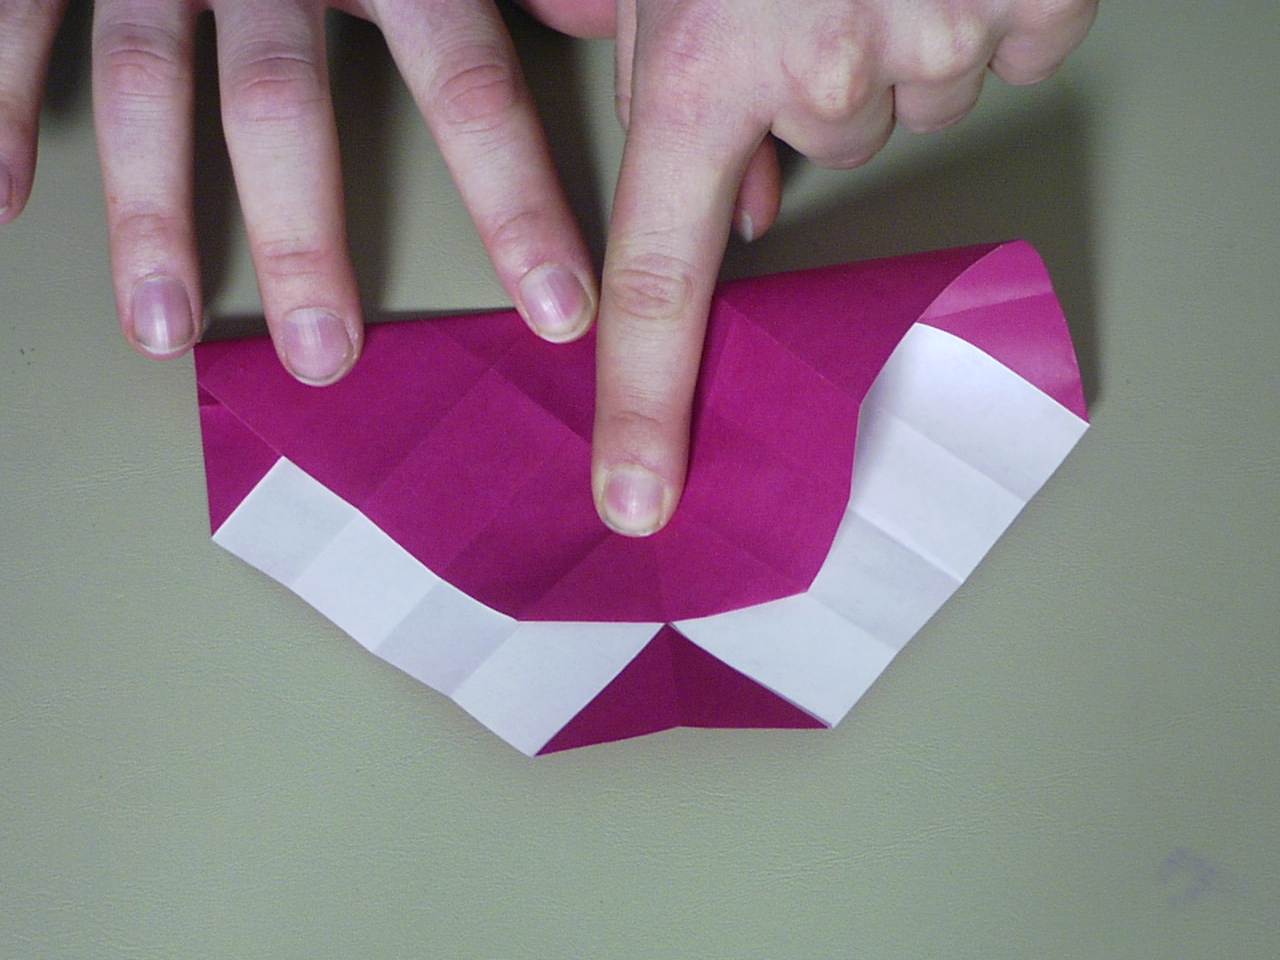
 Step 7
After completing step 6, valley fold from the midpoint of the creases from the last step to the edge as shown in the photo.
 Doing Step 7
Step 7 in progress. Note that the creased edge from step 2 should line up with the center of the paper as well as the creases from step 5.
 Step 8
Valley fold as shown. Note that these folds are half the length of the crease from step 7 and they're wedged between the creases from steps 6 and 7 and the edge. I'll refer to these triangles as "The Wedge" later on.
 Doing Step 8
I usually start with the valley fold that starts from the corner from step 2.
 Still Step 8
Then I valley fold the crease from step 3 which conveniently runs right through the point of The Wedge. It's almost a reverse inside fold when you do it like that.
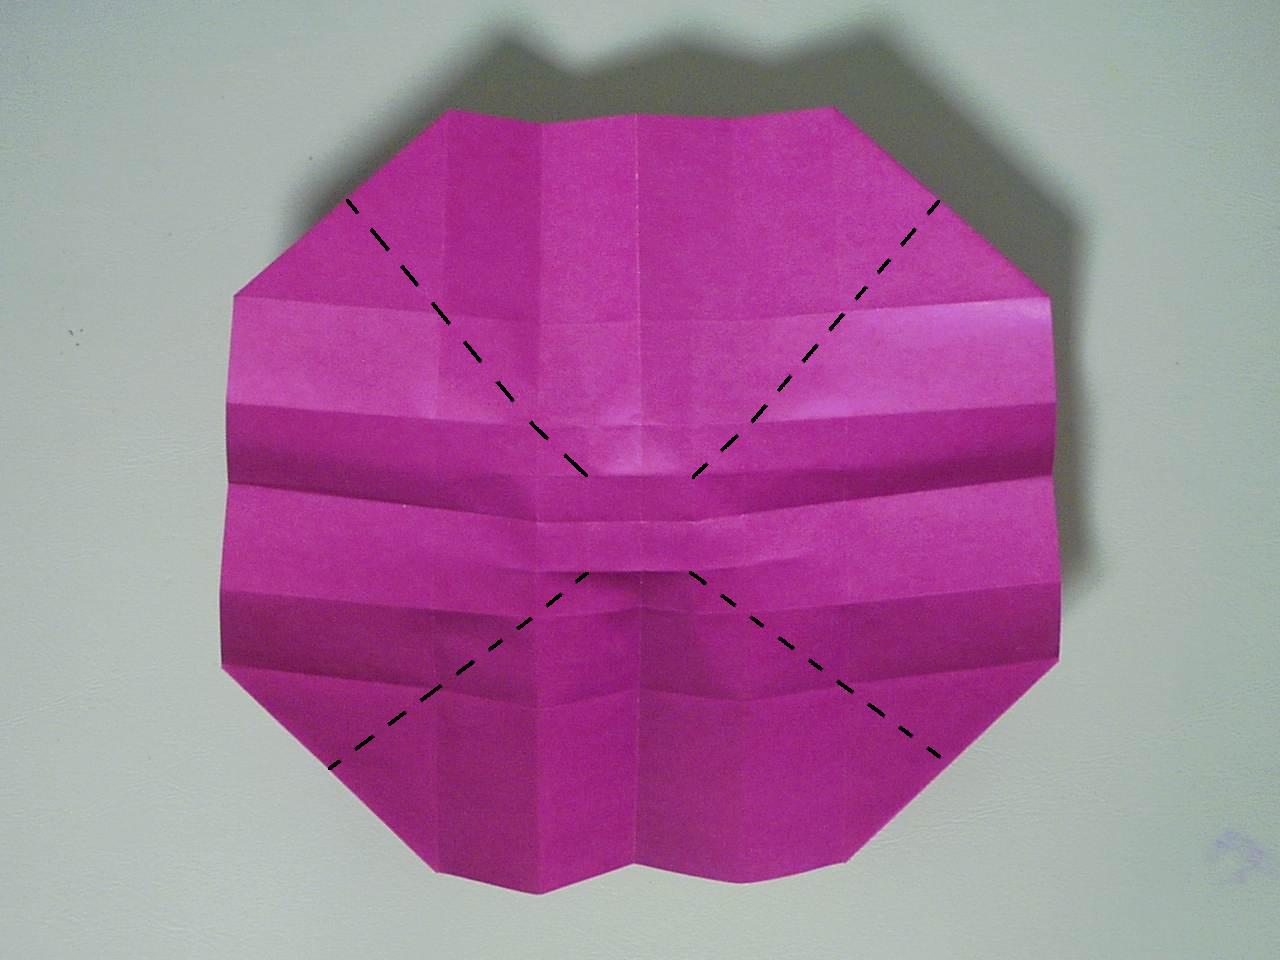
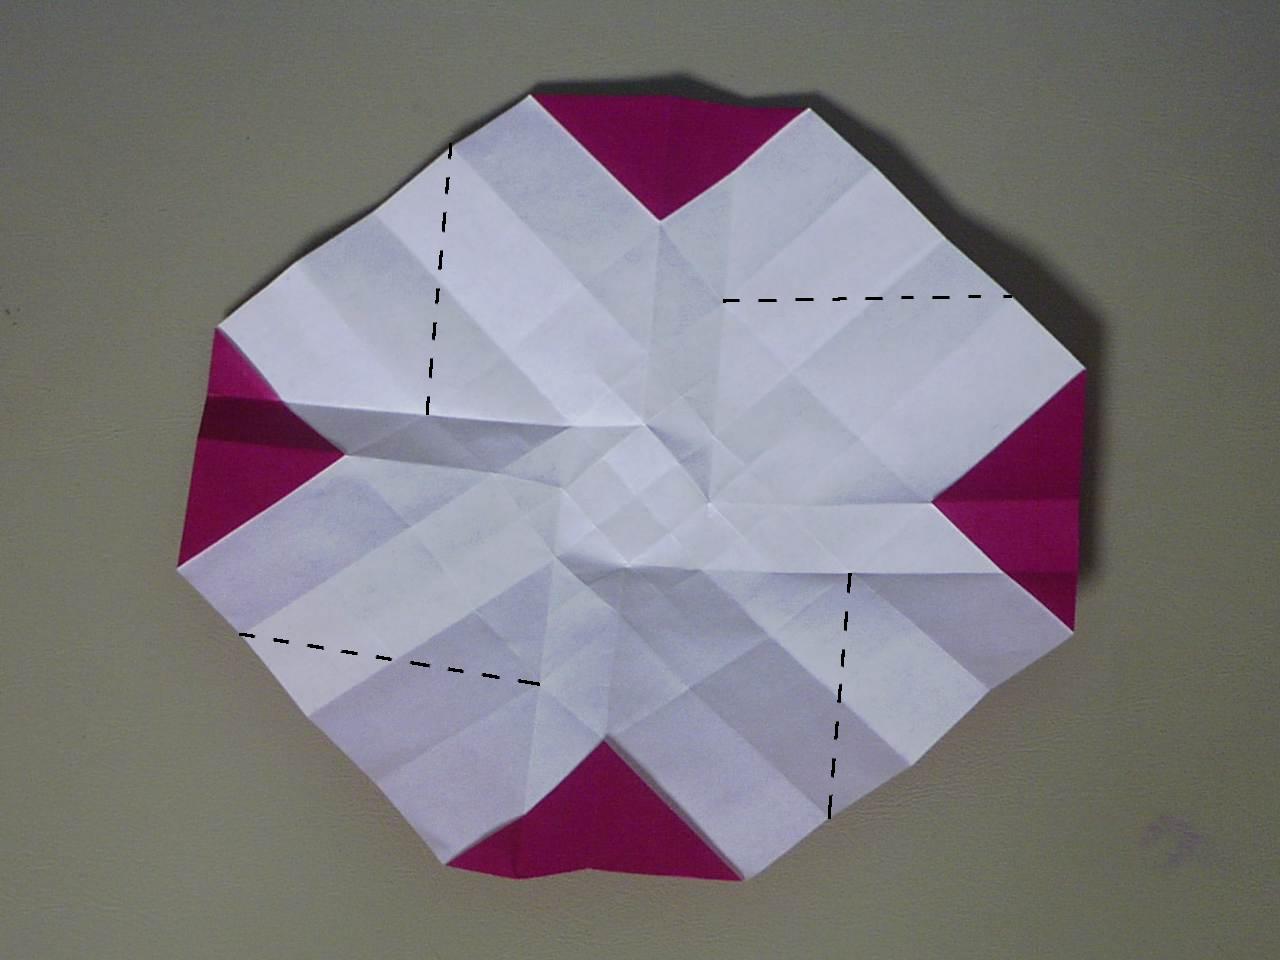
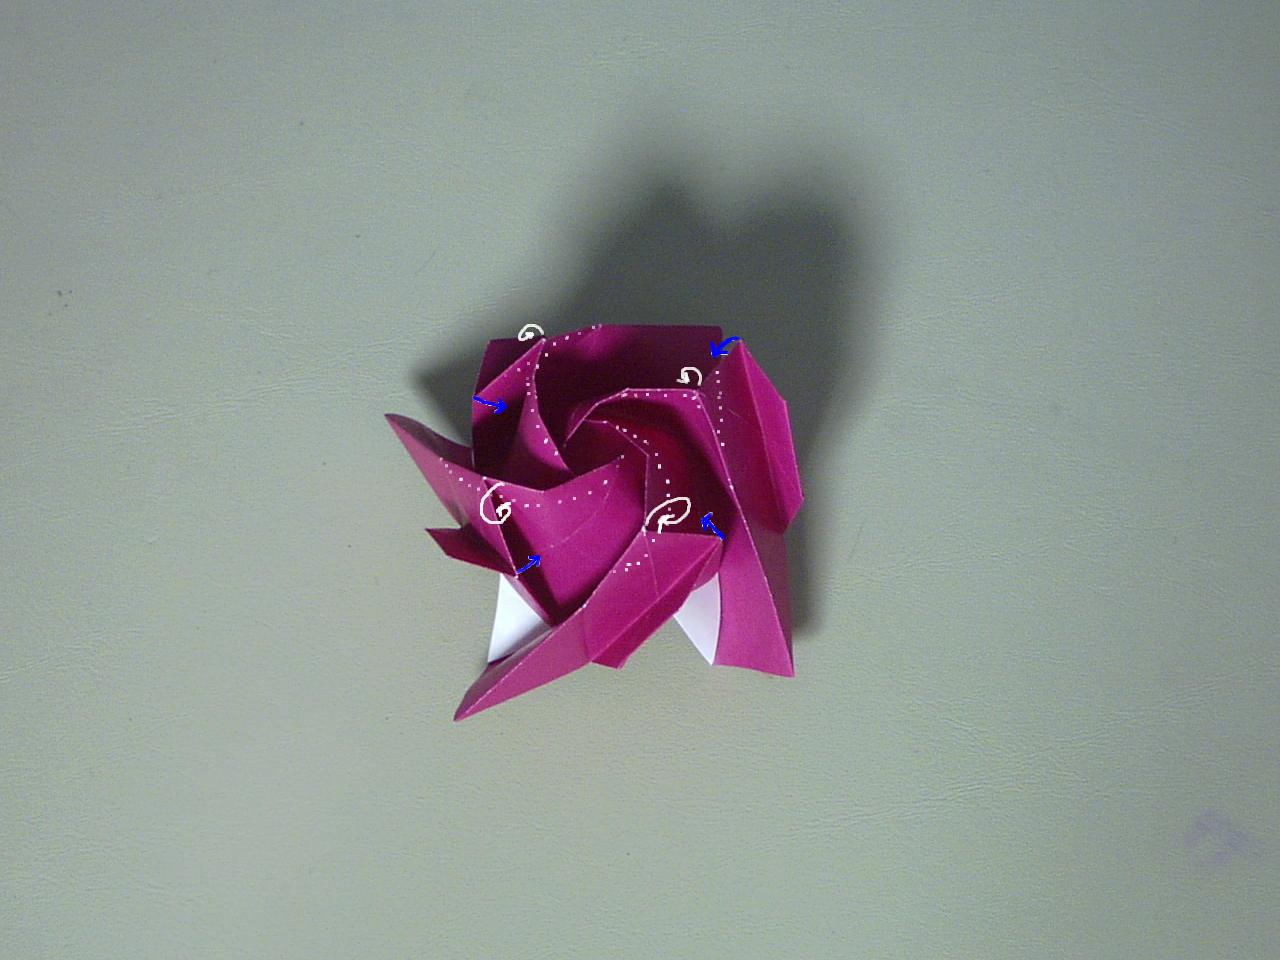
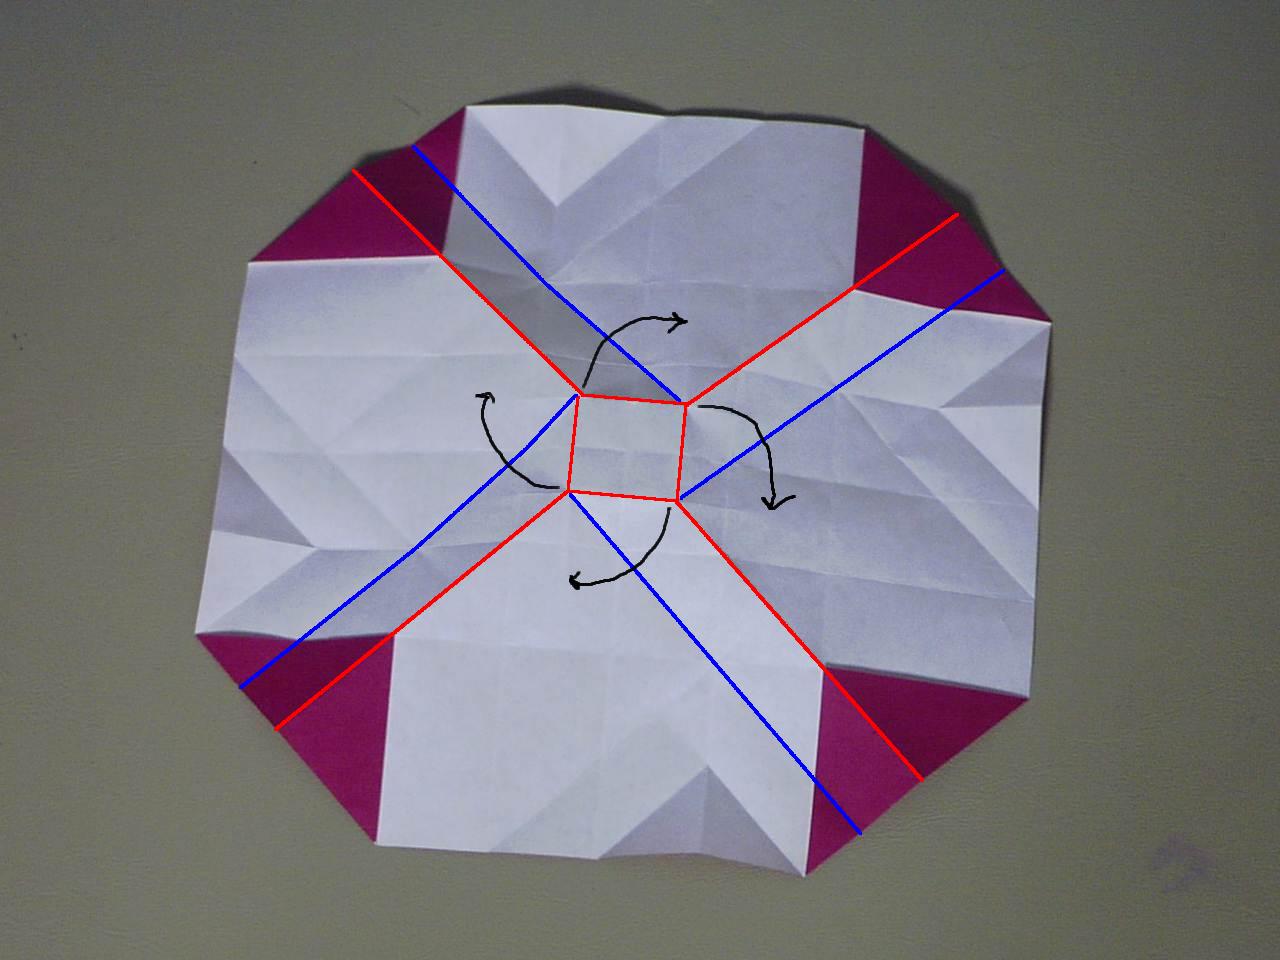 Step 9
Blue lines indicate a valley fold and red lines indicate a mountain fold. The arrows show which direction the center square will twist. The next set of photos show how I do the twist fold.
 Doing Step 9
I start out by folding all the mountain folds. I end up with something that looks like this. I do a valley fold across the center while raising the two sides that I'm holding on to. The other two edges should fold over along the creases from step 6.
 Still Step 9
This is what you should end up with.
 More Step 9
And when you look at it from the other side, it should look like this.
 One More Look
And finally a view face on.
 Finishing Step 9
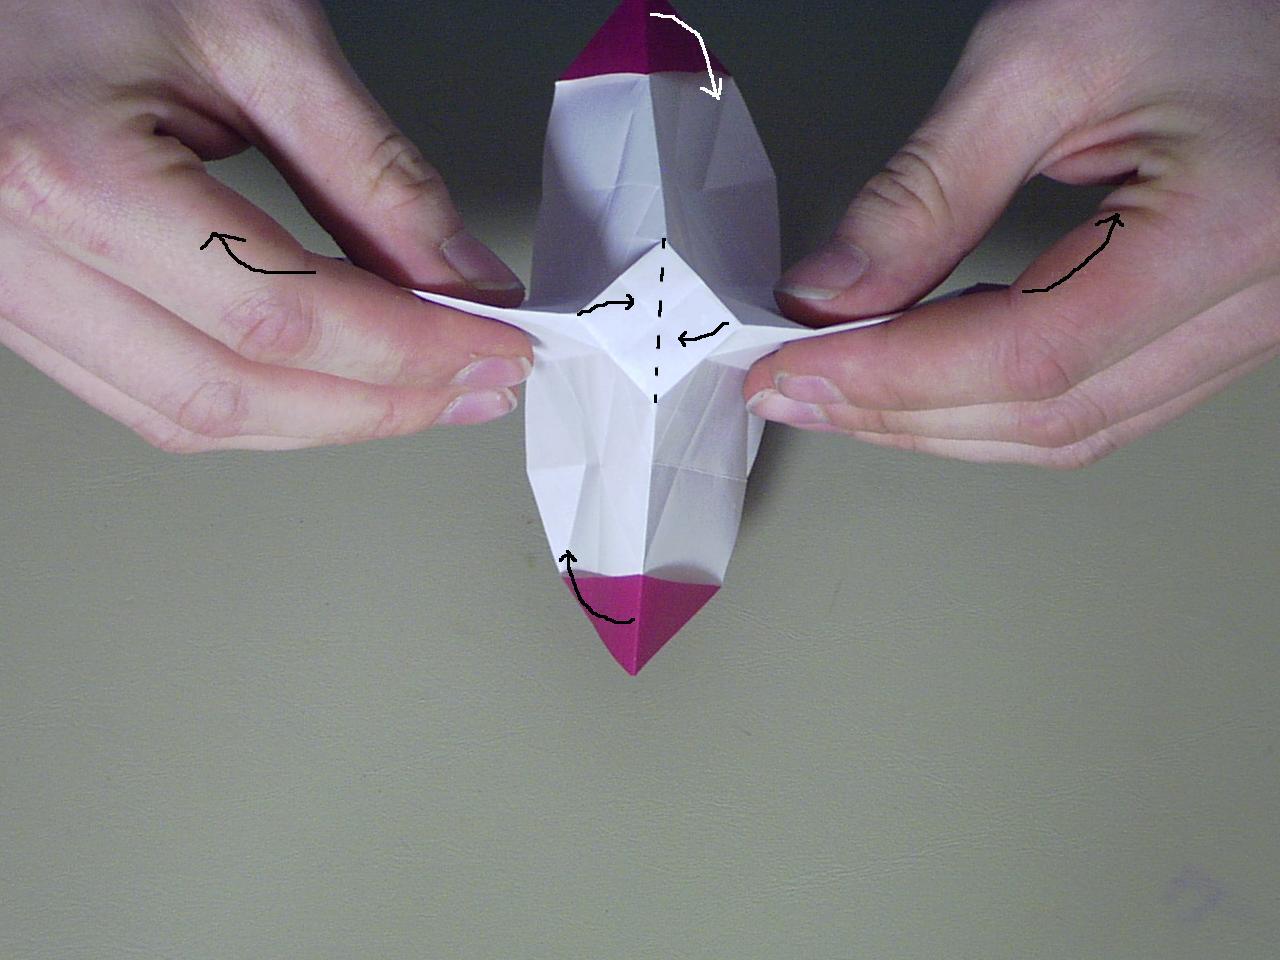
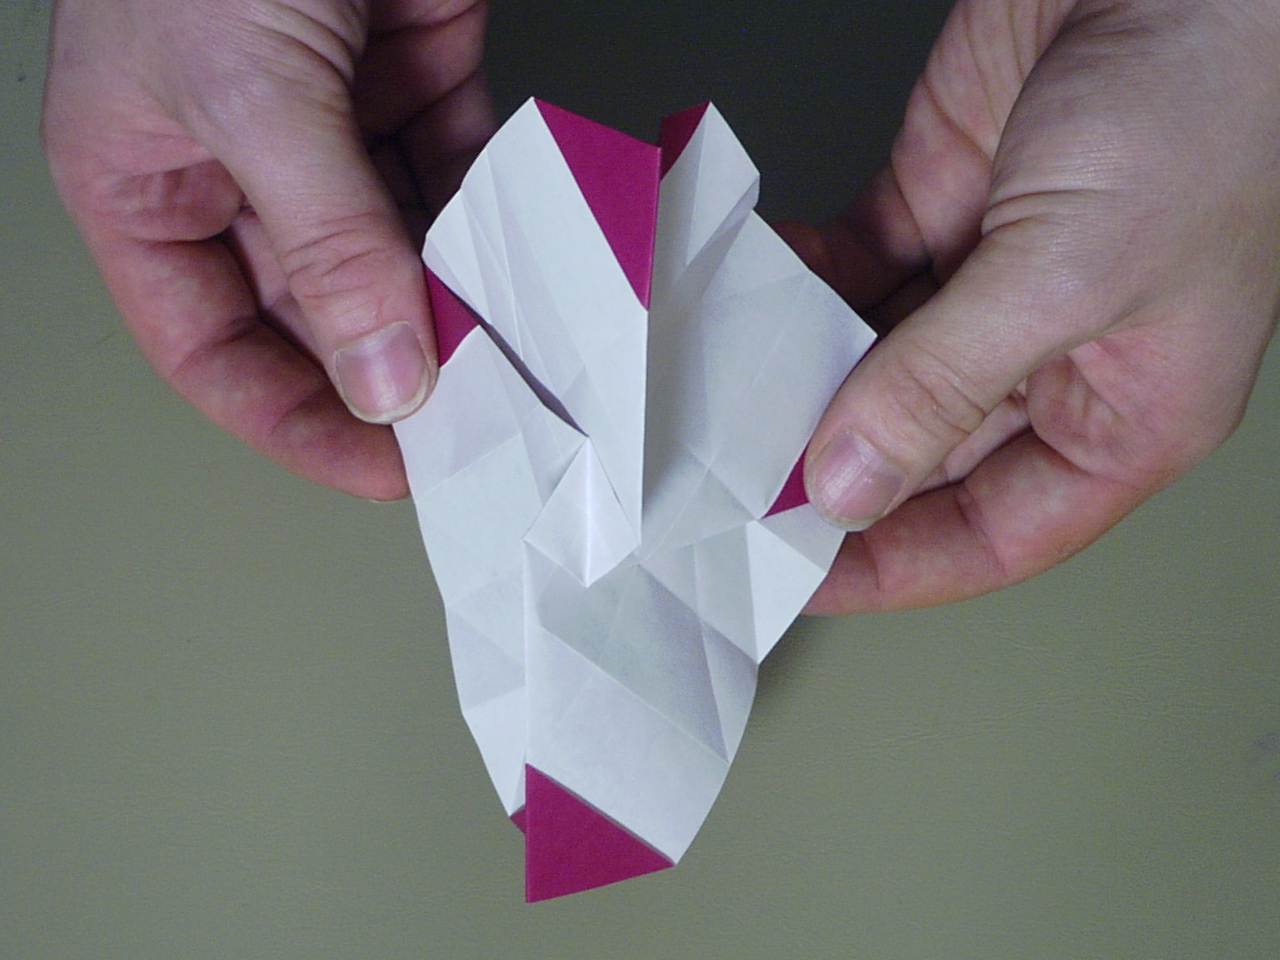
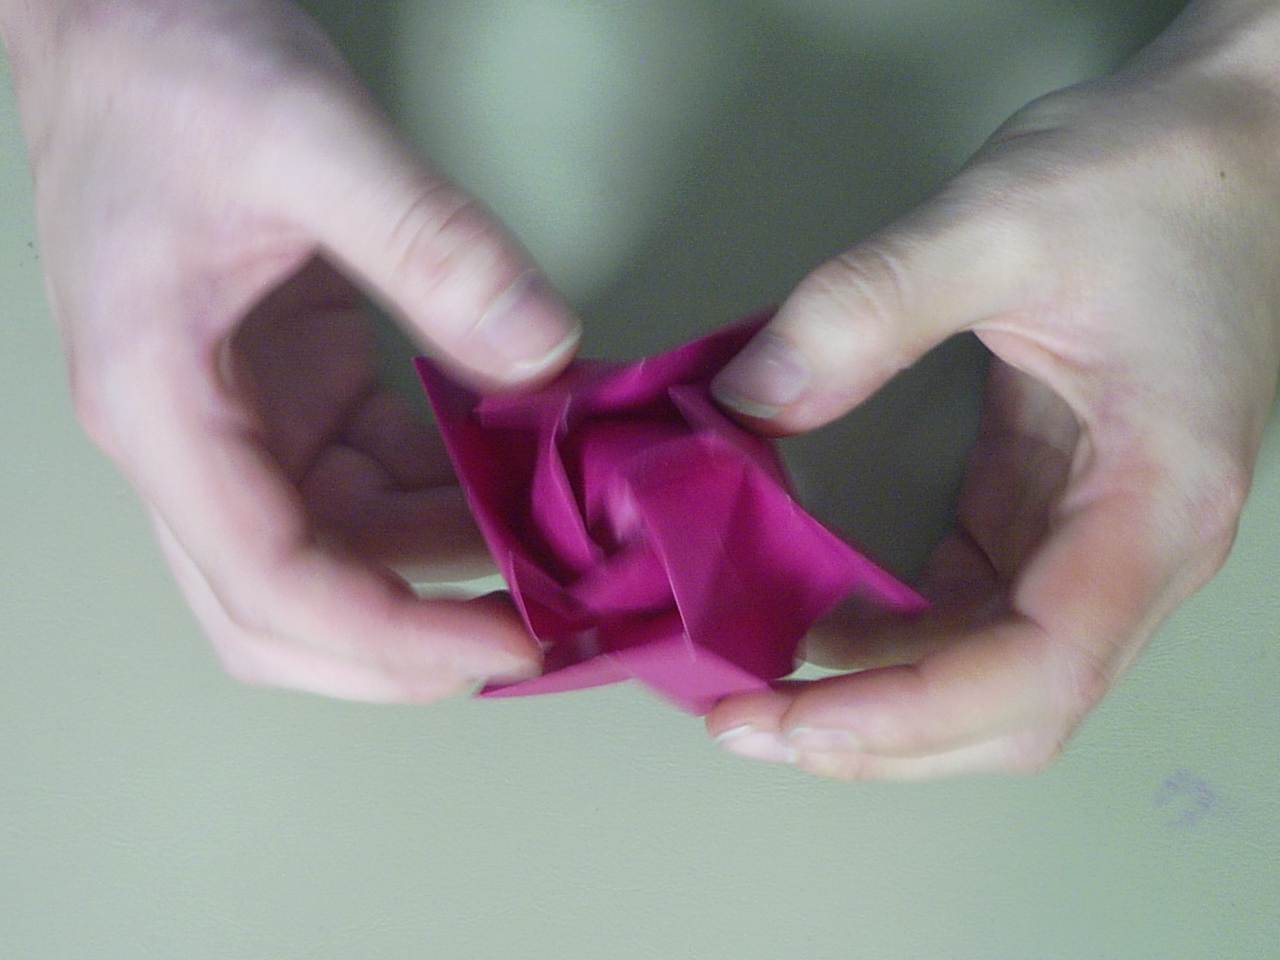
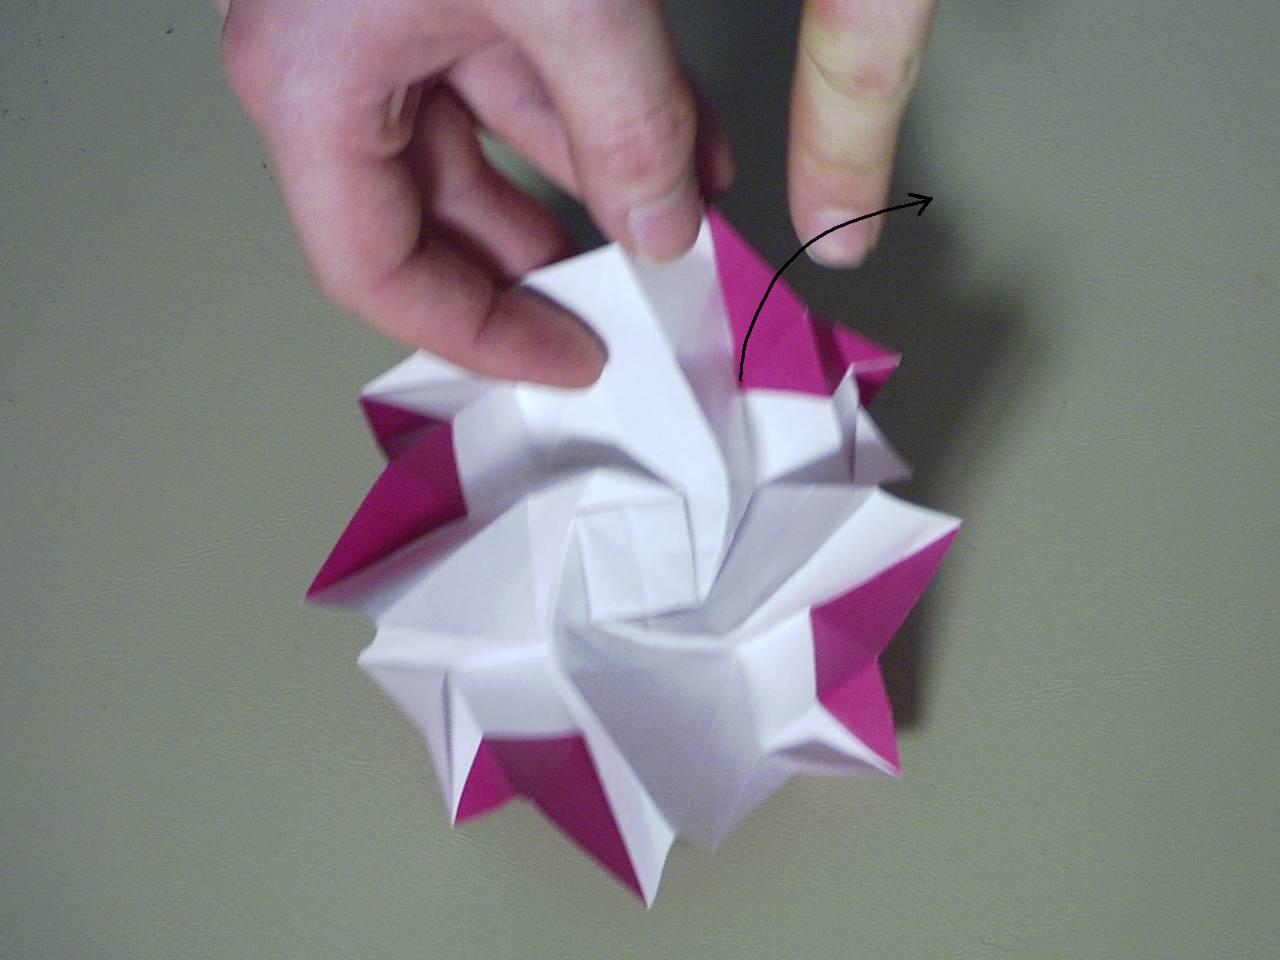
Finally, the two corners that you were looking at two photos ago (it should be right above this one) should be pulled apart and it ought to look kinda like this while you're doing it.
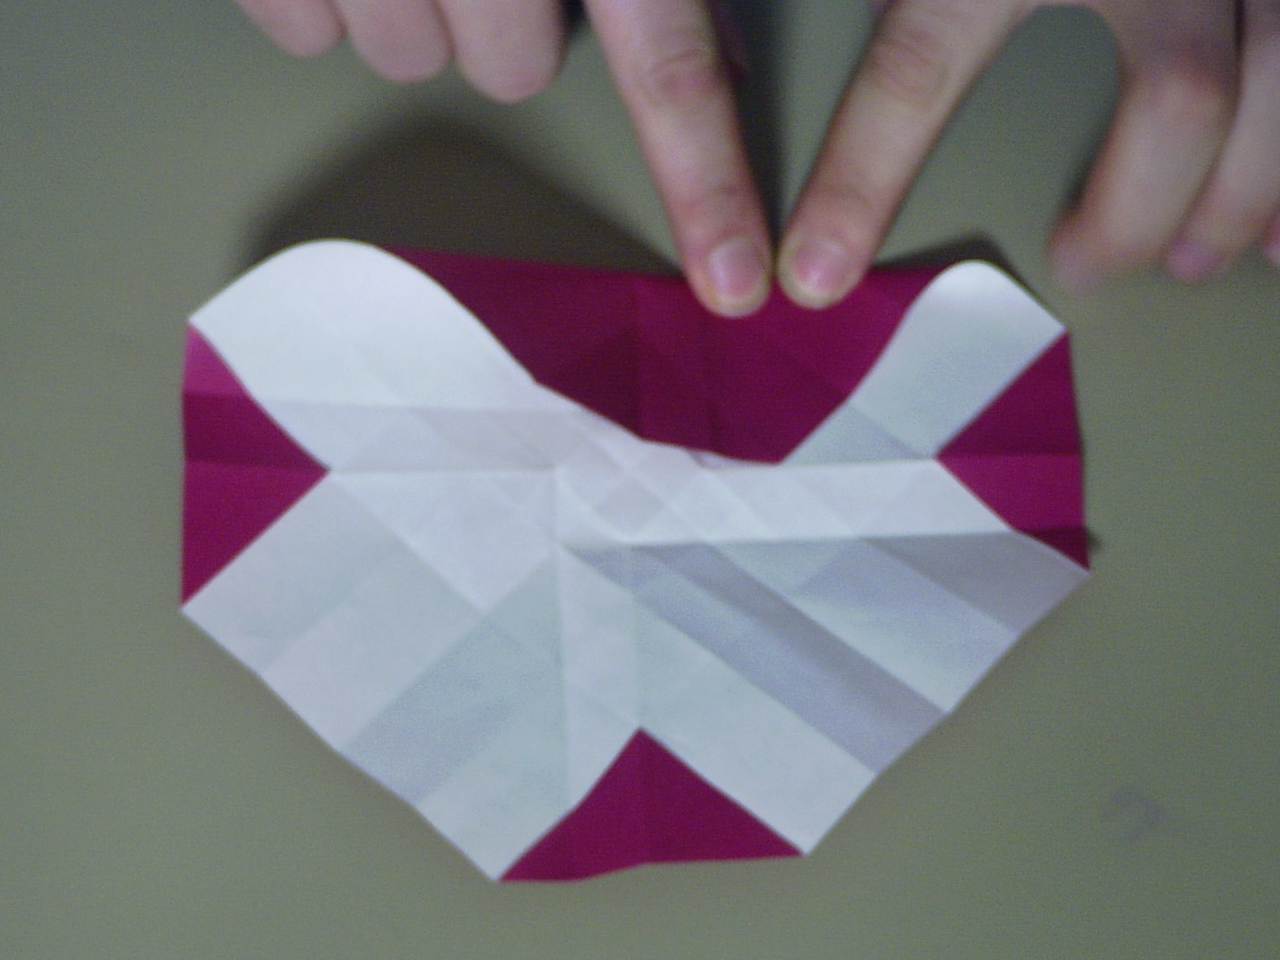
 That Was Easy!
Or maybe it wasn't so easy... but in any case, if you have something that looks vaguely like this, then you're definitely on the right track.
 Step 10
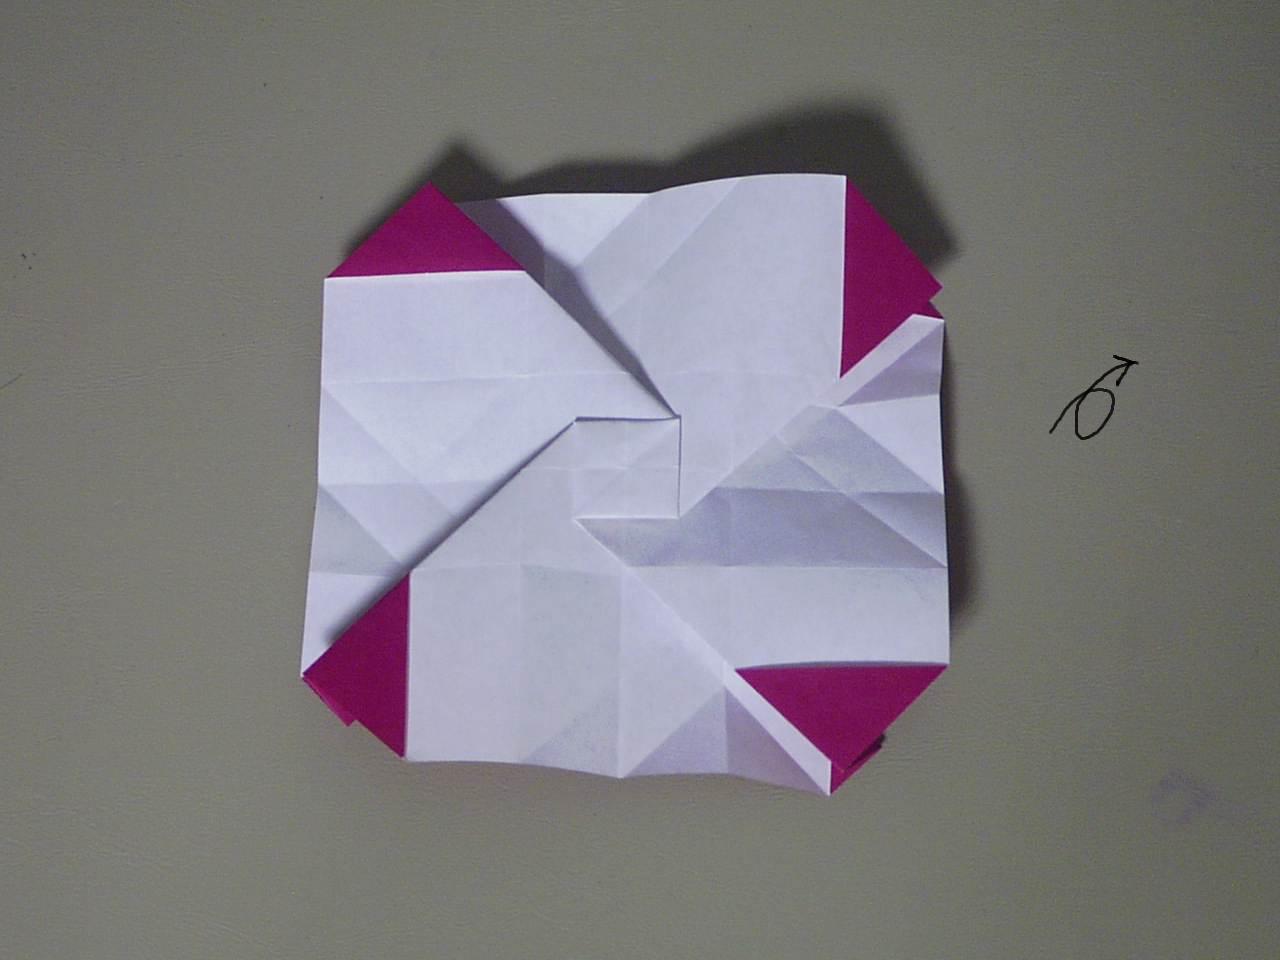
This is probably not entirely necessary since the center ends up opening up on it's own anyway but it can make the next few steps a little easier if you open up the center a little bit.
 Step 11
Lift up one of the flaps like the arrow shows...
 More Step 11
when you lift up the flap, it should look like this. Mountain fold where indicated (I know it's a little hard to see the mountain fold line in the photo, but click on it for the full size photo and it should be a lot easier to see - It's one of the creases from step 1) and valley fold along the white line (one of the creases from step 3). Flatten out the crease that is the flap that you're lifting from the point where the mountain fold intersects it to the edge of the paper (as indicated by the white arrow)
 Step 11 - Result
This is what you should end up with. Do the same thing on the other three sides.
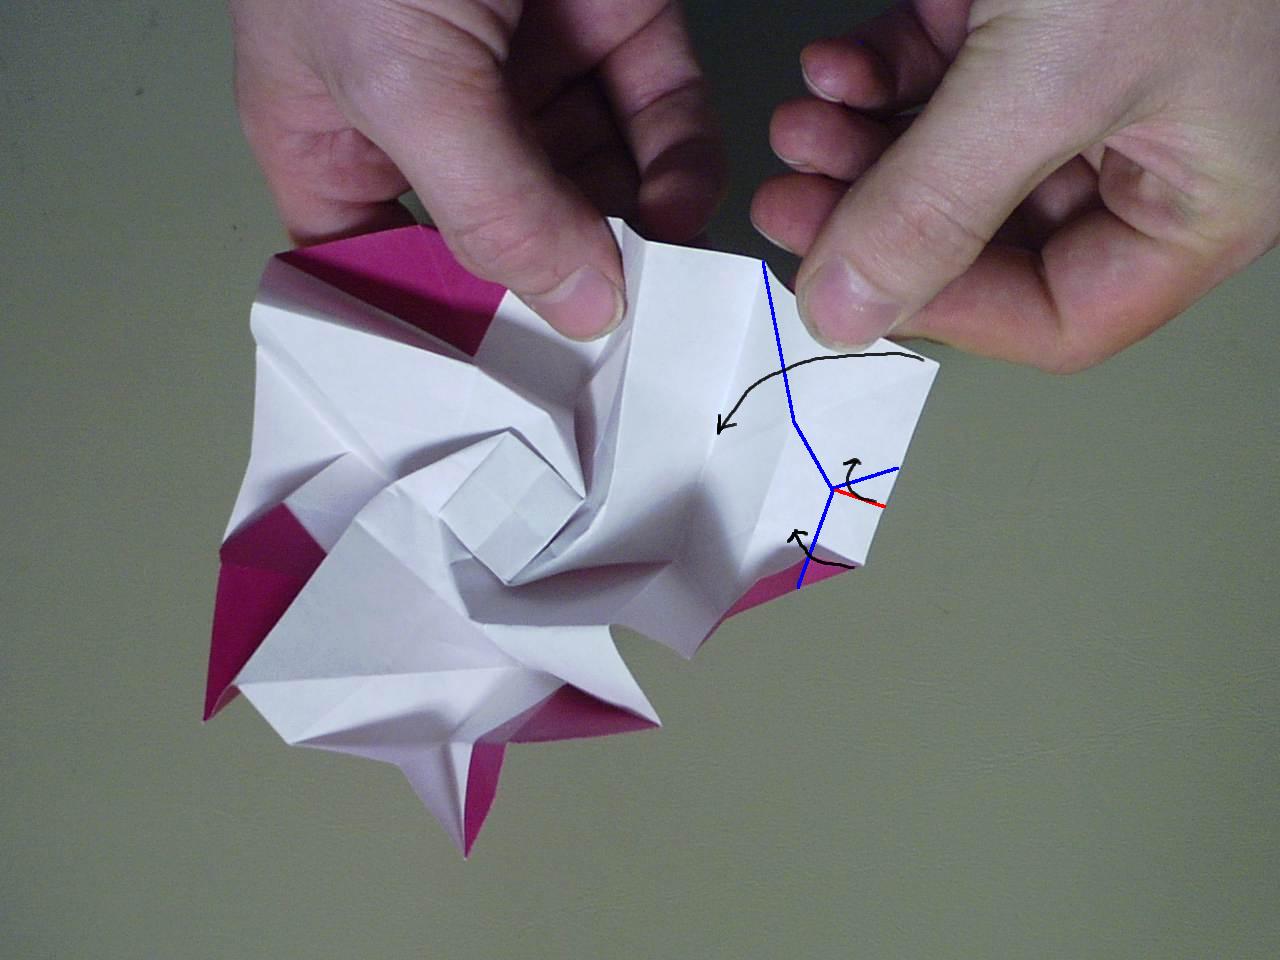
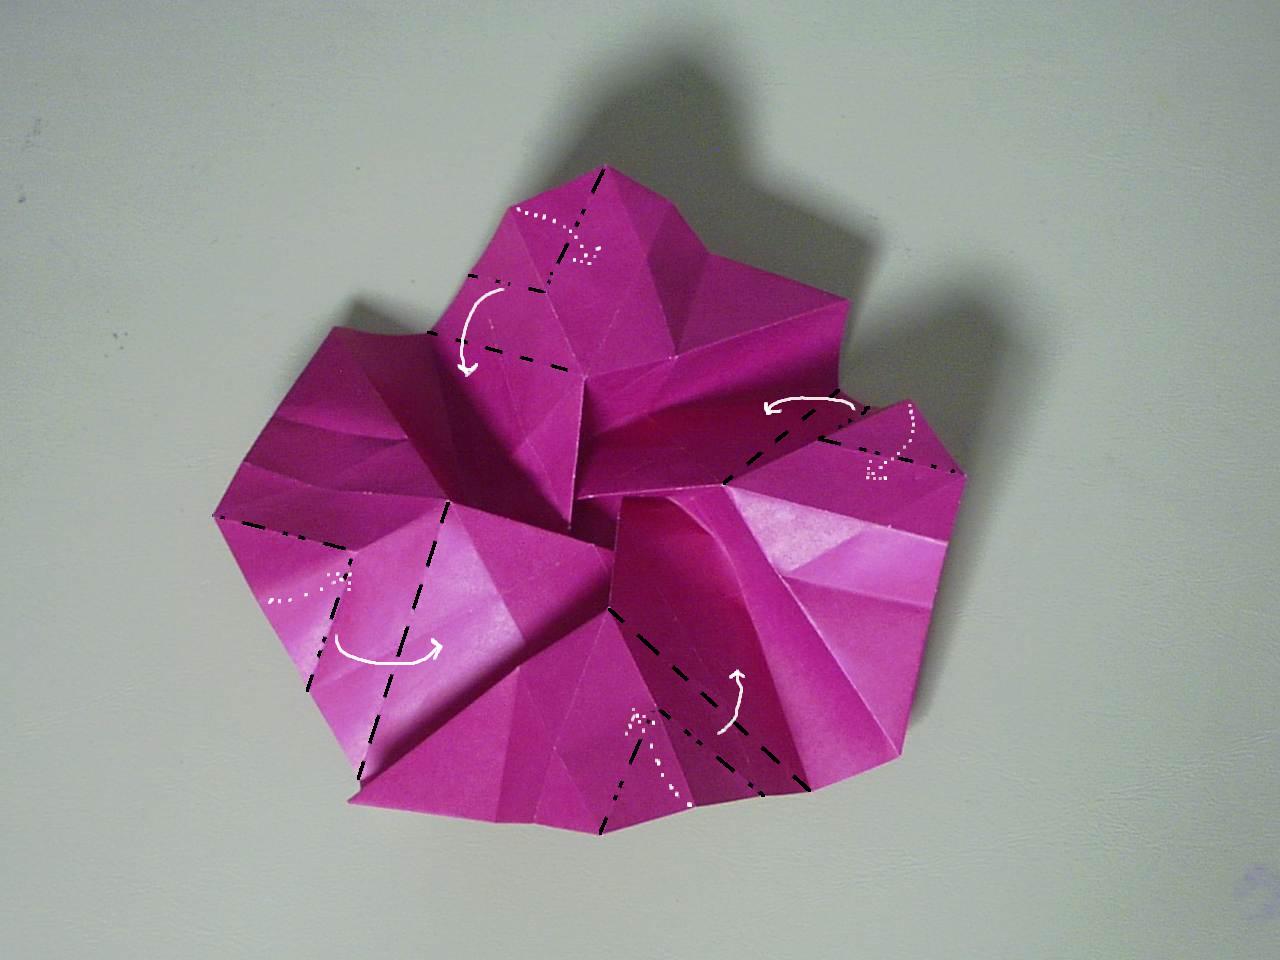 Step 12
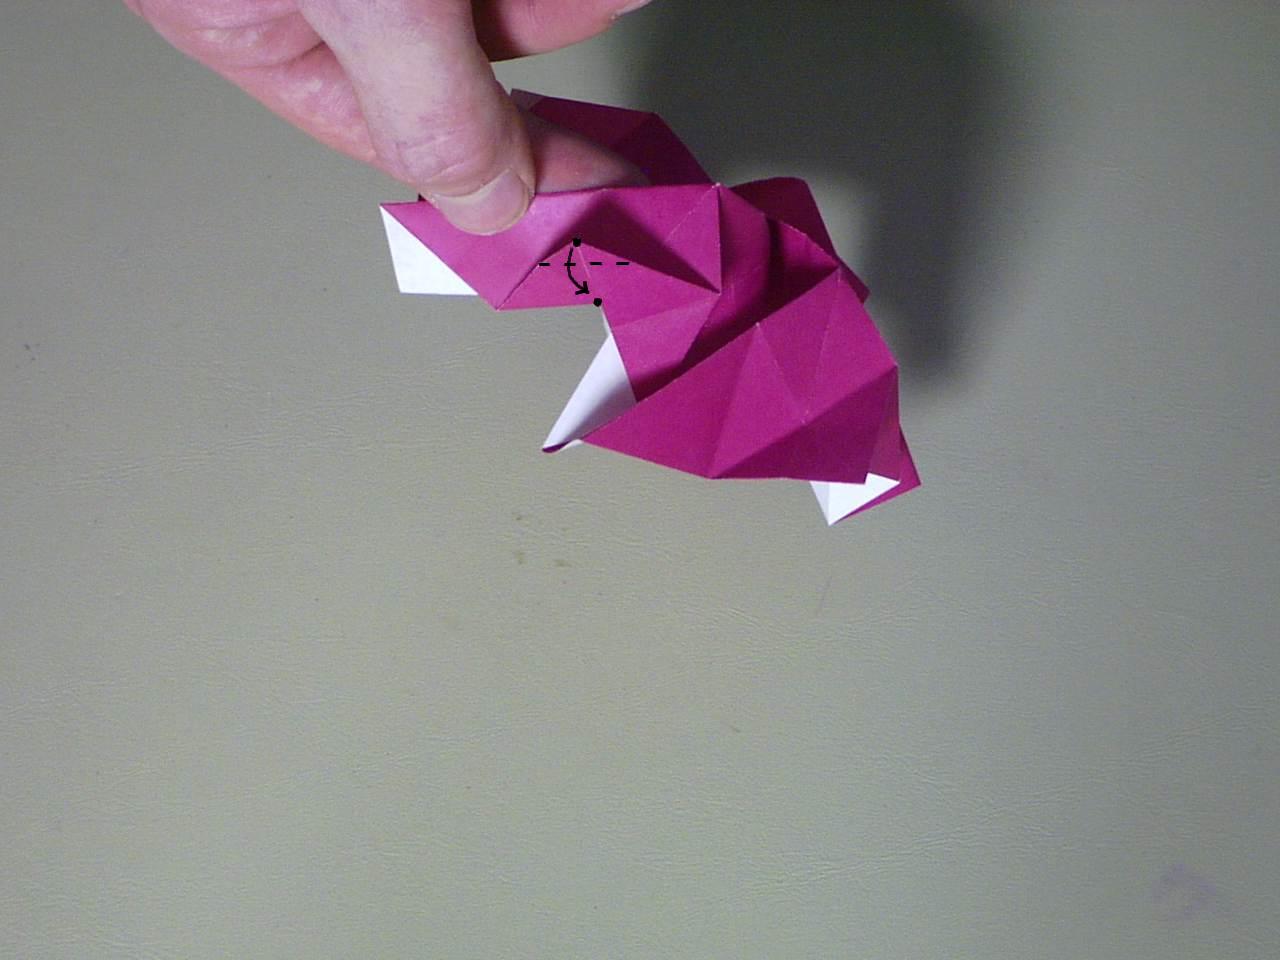
After you finish step 11 on all four sides, you should end up with something that looks about like this. Now... remeber The Wedge? Good. The push the edge of The Wedge down and in so the two mountain folds meet up with each other (the dotted white arrows) and valley fold along the crease from step 7 (the solid white arrows). If you have problems with this step and the next step, try doing step 12 on one side, then step 13, then move on to the next side and do step 12 and 13 there, then on to the third and fourth sides.
 Doing Step 12
It ought to look a little like this while you're doing step 12. The tip of my index finger on the right is where The Wedge is essentially reverse folded inside there.
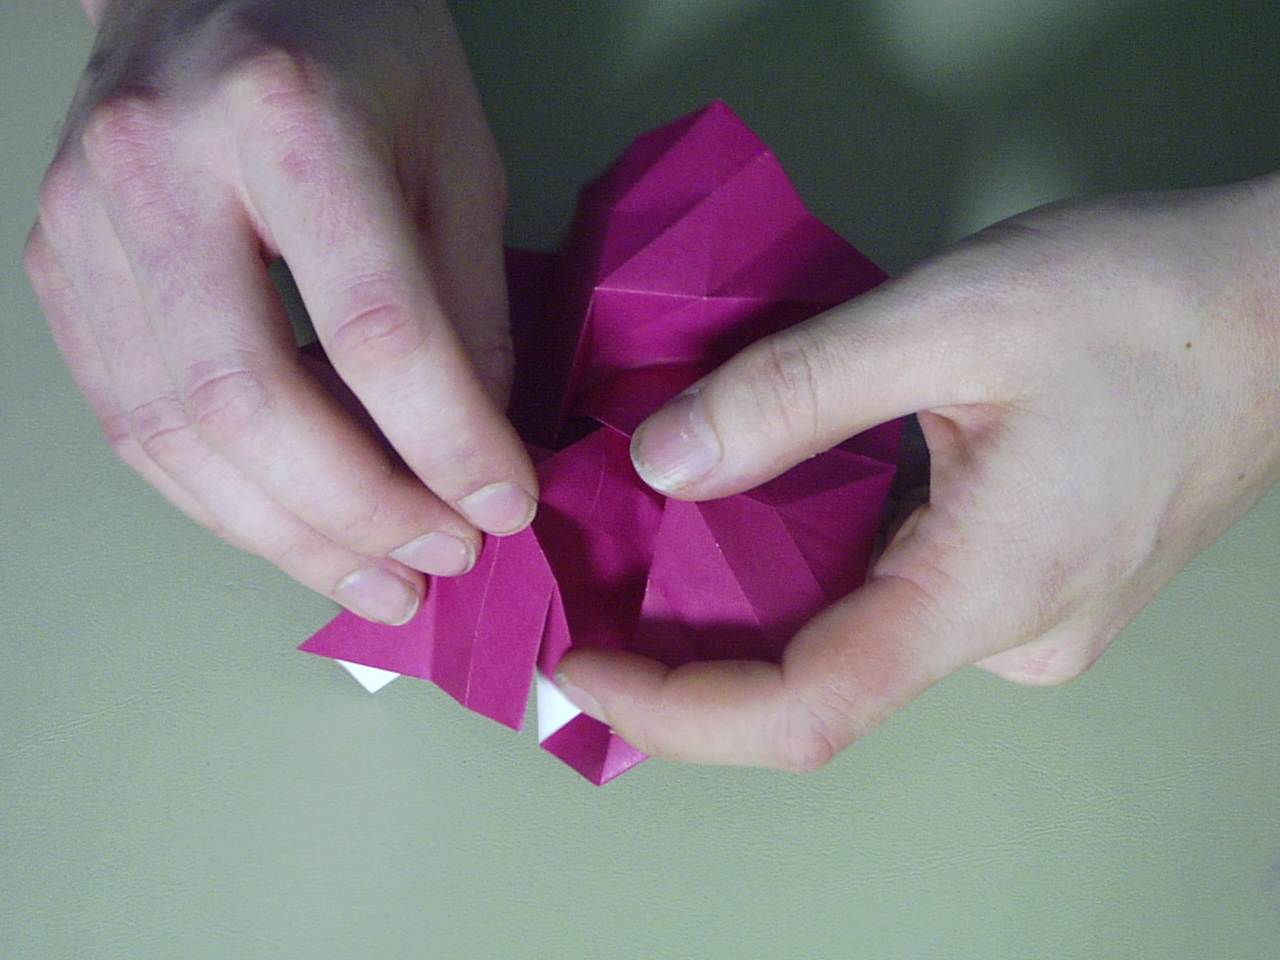
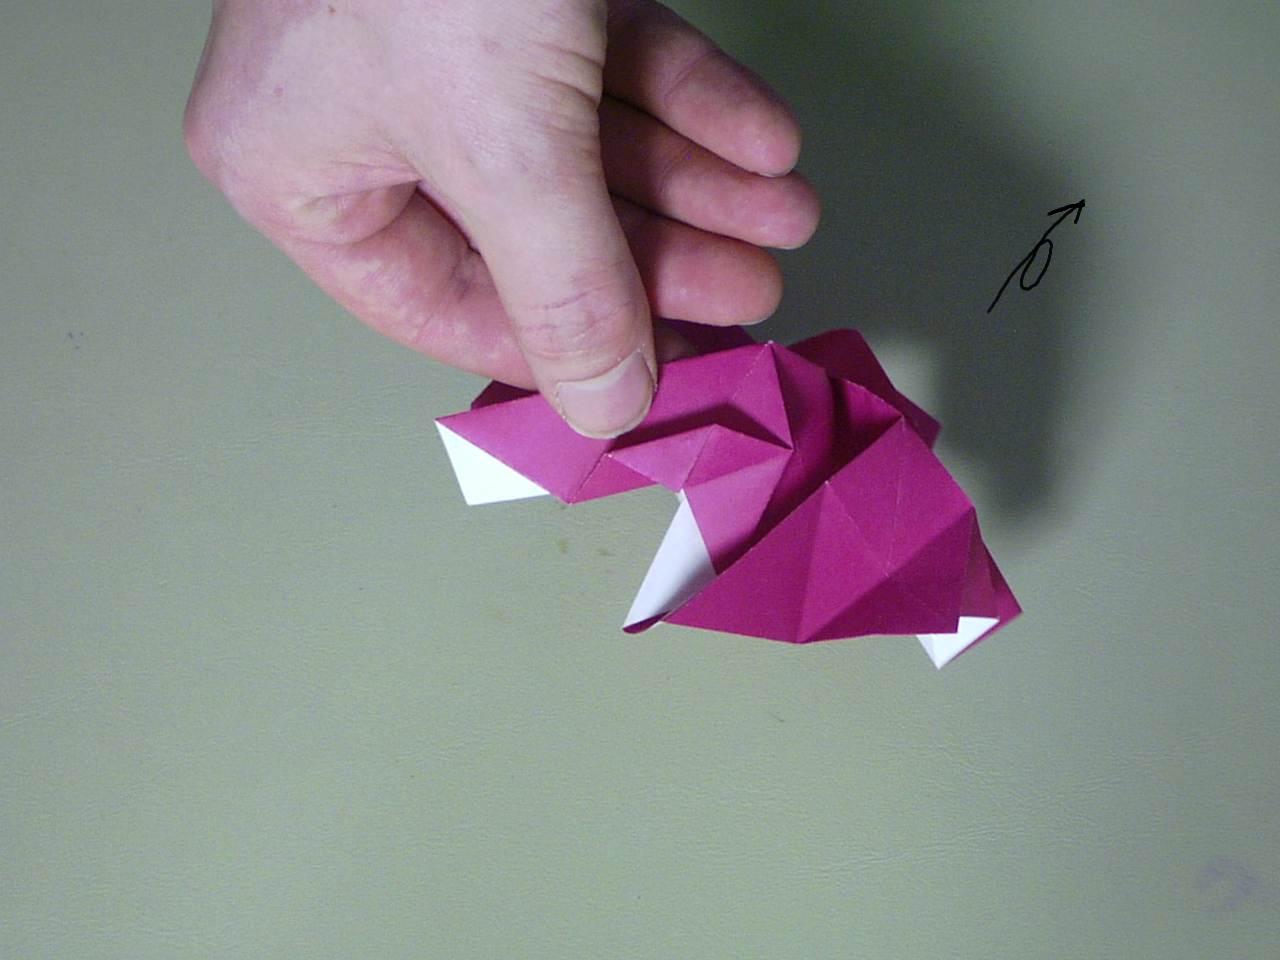
 Step 12 - Partial
This is what you you should end up with after pushing all four of the wedges in like that.. the valley fold won't stay put on it's own yet....
 Step 12 - Result
So to give you an idea of what it would look like if they did stay put, I'm holding everything in place. I know it's a blurry photo here but that's ok.. it should give you an idea how things should look.
 Step 13
Next, take the top flap and fold it up to the edge as shown.
 More Step 13
That's what it should look like. Note that The Wedge below the tip of my thumb. Do the same thing on the other three sides.
 Step 13 - Result
This is what you should have after completing step 13. The valley fold from step 12 should be holding a little better now...
 Another View
This is how it should look from the underside.
 Step 14
The next few steps are optional and if you're just trying to get the feel for folding the rose, you might want to skip them. It's one of my personal tweaks that satisfies my own sense of aesthetics. Take the point you just folded up to the edge and fold it at the midpoint as shown in the photo (it's easier to see in the full size image)
 Step 14 - Result
Just like the photo shows. Now turn it so that we're looking at it from the underside again.
 Step 15
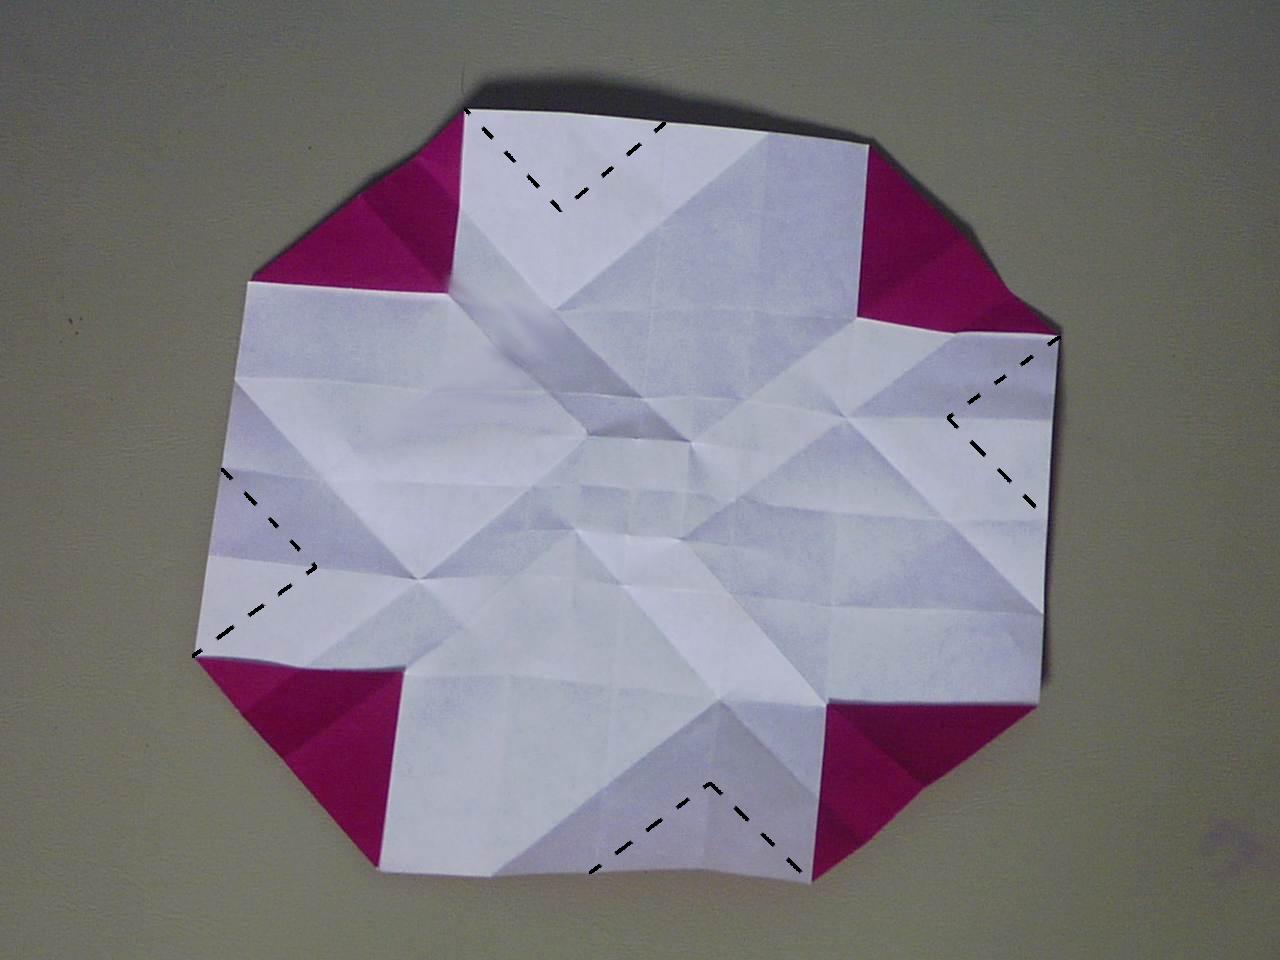
Again, part of my personal tweak here. Take the corner that you folded waaaaaay back in step 2 and pull it out like the arrow shows.
 Step 16
Now you're going to put that corner right back in it's place. In the process you'll tuck one corner inside there so that the point you folded there in step 14 won't be a point and won't come undone so easily. Blue lines are valley folds and the red line is a mountain fold. The arrows show the general direction that the paper should move.
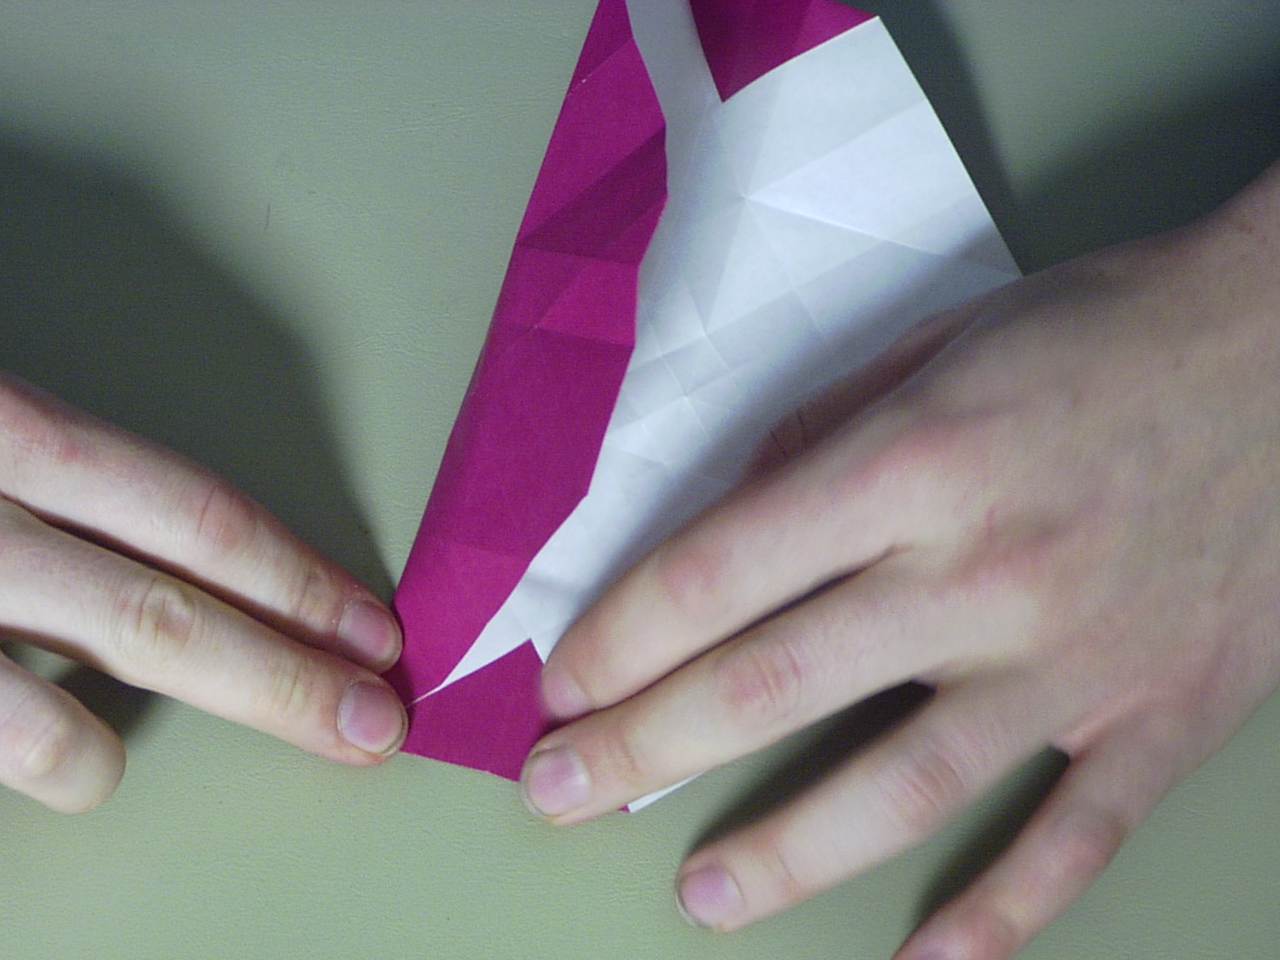
 Doing Step 16
This is what it should look like while you're folding the corner back into place. Notice that the left side of the corner below my thumb on the right is getting covered up.
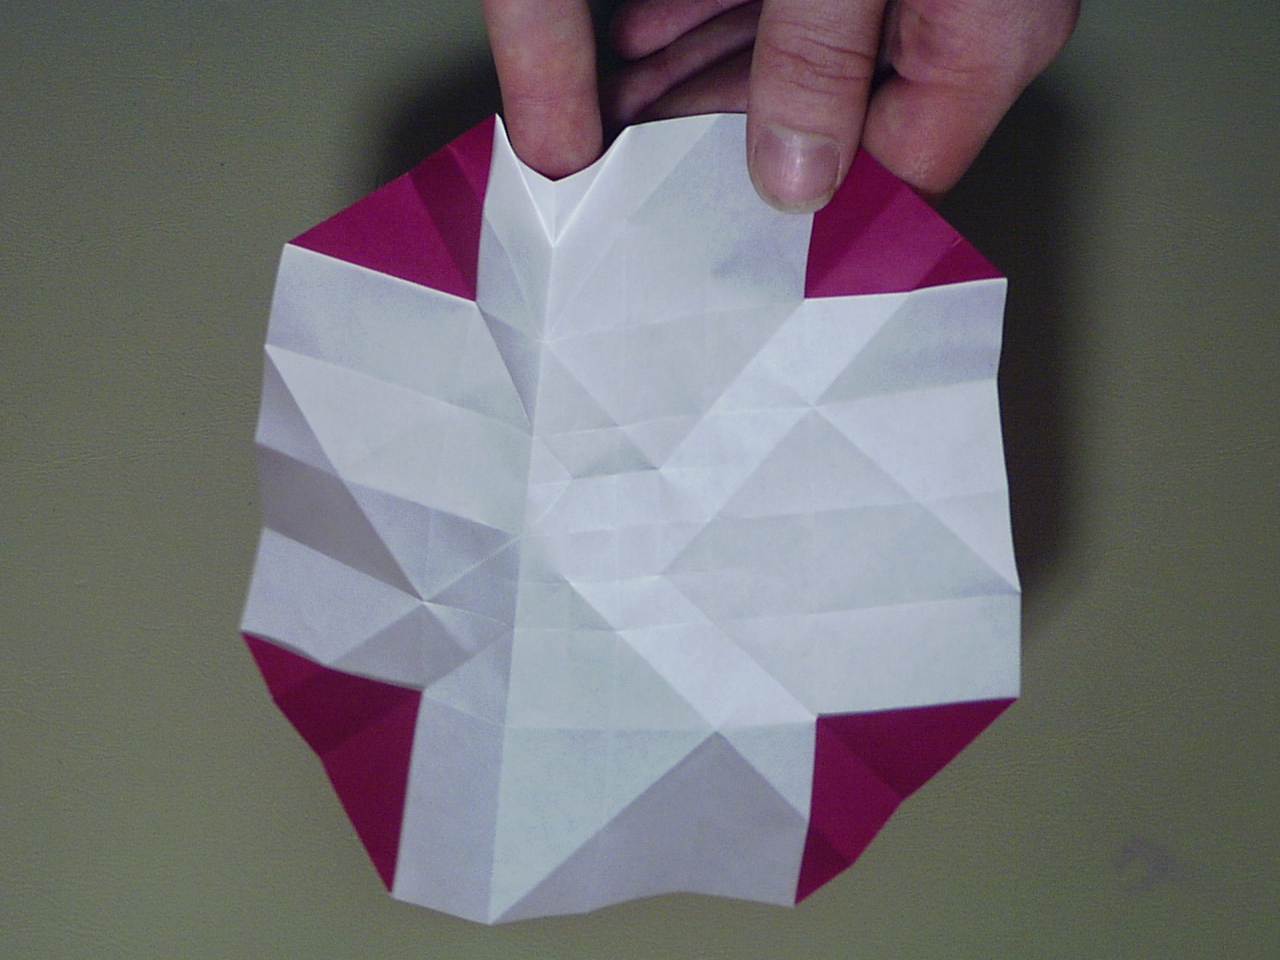
 Step 16 - Result
This is what it should look like after completing one of the four points (at the tip of my thumb there). Repeat steps 14 to 16 on the other three sides.
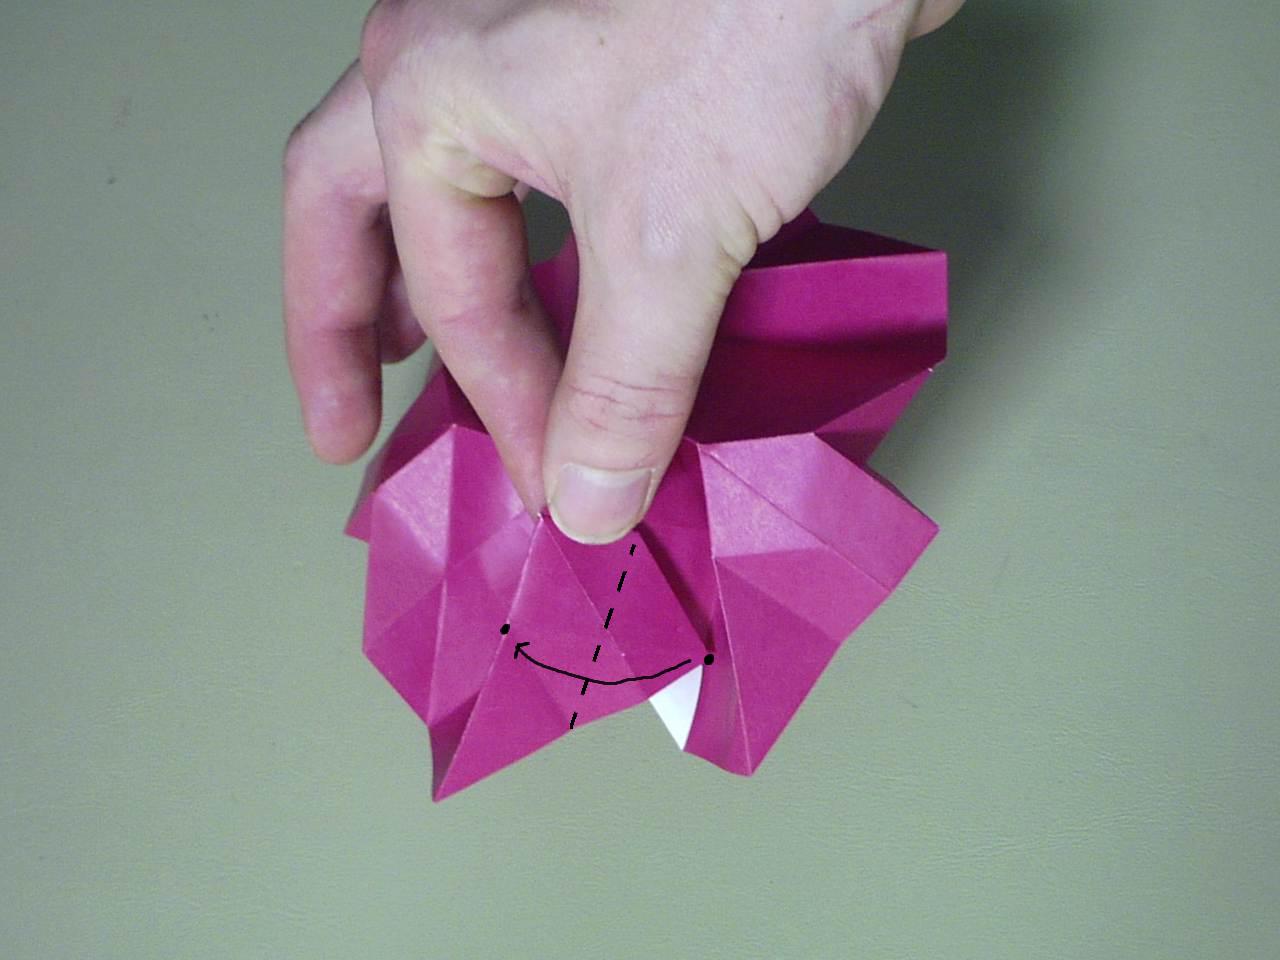
 Step 17
We now return you to your regularly schedualed steps. doing one side at a time, push the corner indicated by the blue arrow up against the next layer and then carefully curl the corner indicated by the white arrow. When I first started making these, I did a solid crease about where the dotted white line is (see full size image) but I now try to aviod a crease since a gentle curl looks a little more natural. If you're having trouble, go with a crease.
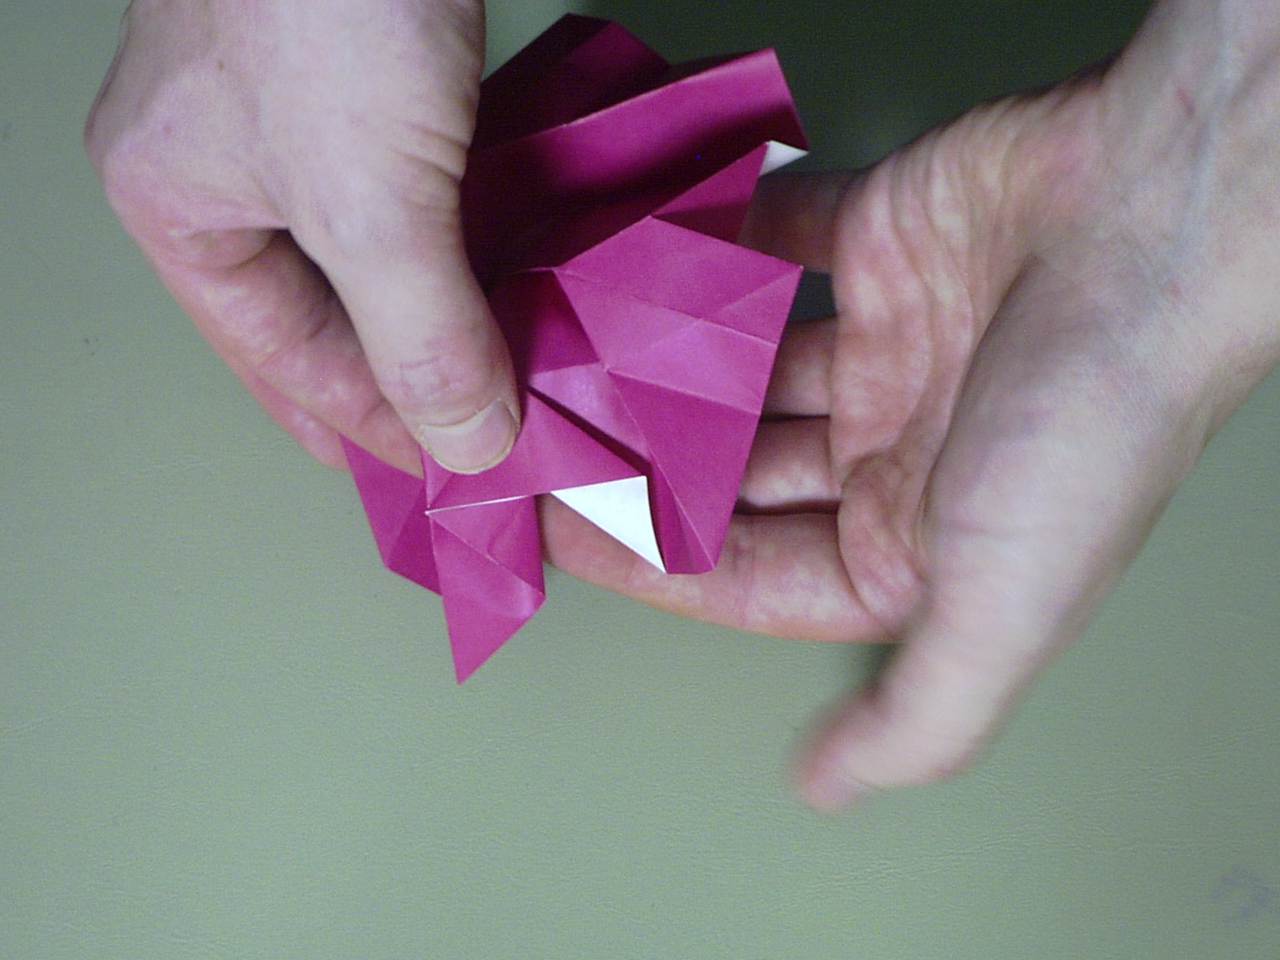
 Doing Step 17
I realized a little too late that my fingers do an excellent job of obscuring the process of me curling the edges over like that, but I posted it anyway since every little bit helps. take a look at the full size image just in case it will help.
 Step 17 - Result
This is what it ought to look like after you finish curling the edges. It's probably one of the more dificult steps to complete without a little bit of tearing towards the center so don't worry too much if that happens.
 Step 18
Valley fold the top layer as shown. Crease only the layer that goes under the cropped corner that you did in steps 14-16. Take a look at the full size image to see the line clearly.
 Doing Step 18
This step does a couple of things. It pushes the flap steps 13-17 out to look more petal-like, and it also makes a nice pocket to stuff it's own point into in in a couple of steps.
 Step 18 - Result
This is what you should end up with.
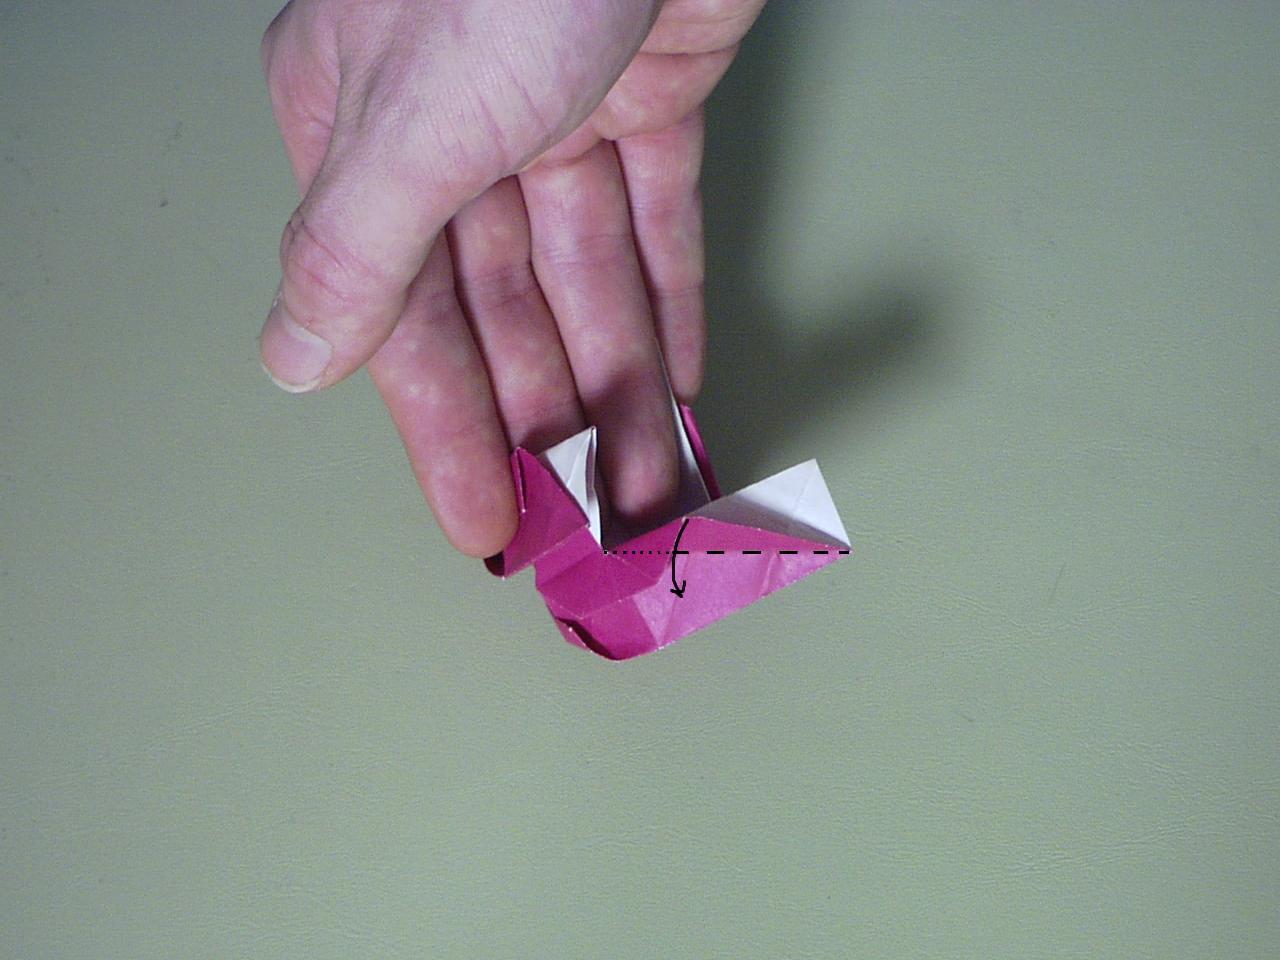
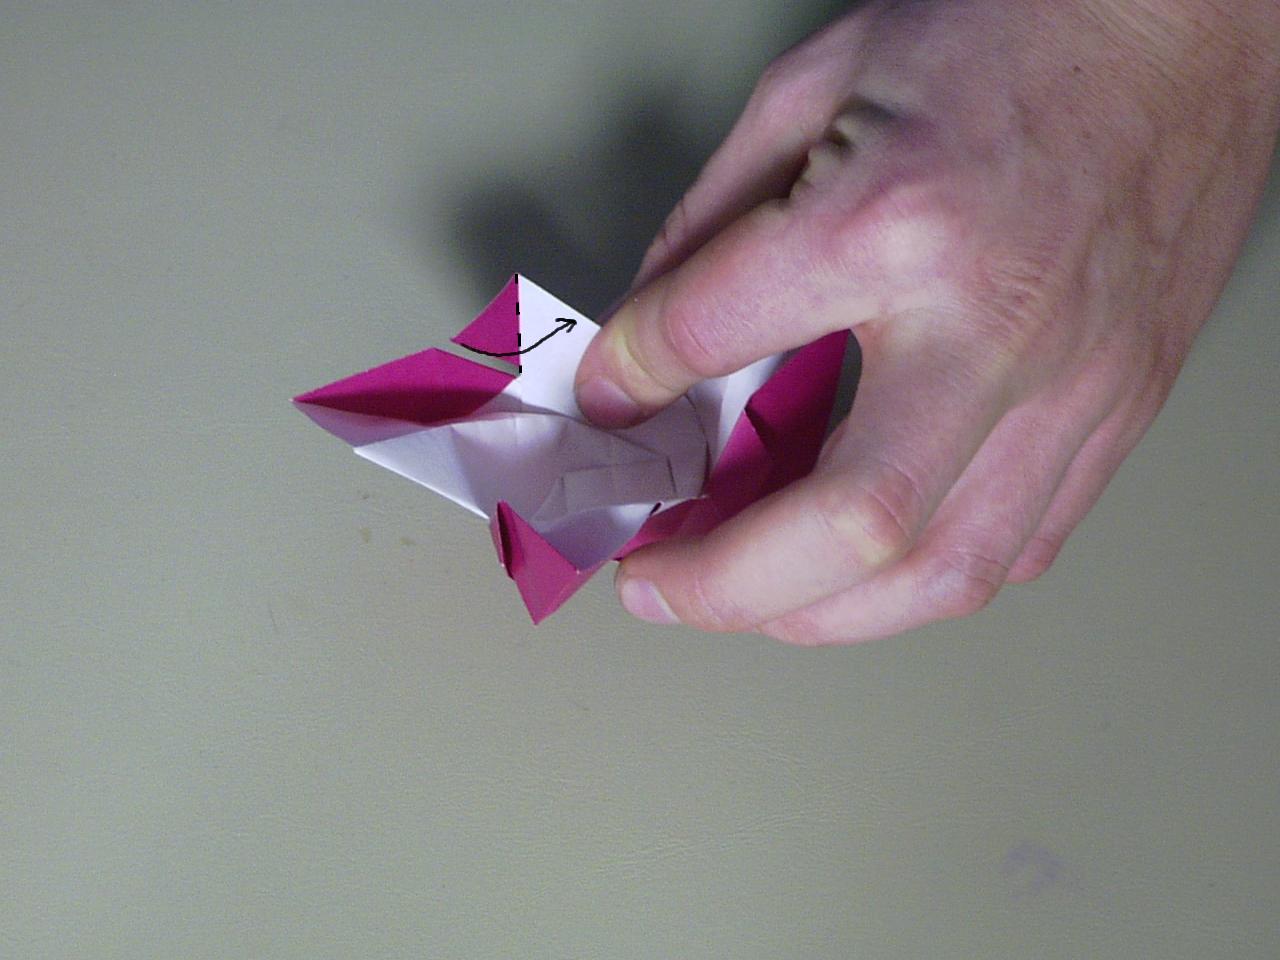 Step 19
And from the underside (the reverse view from the last image)we see that red corner poking out from behind the white point there... just wrap that around the point as indicated by the arrow.
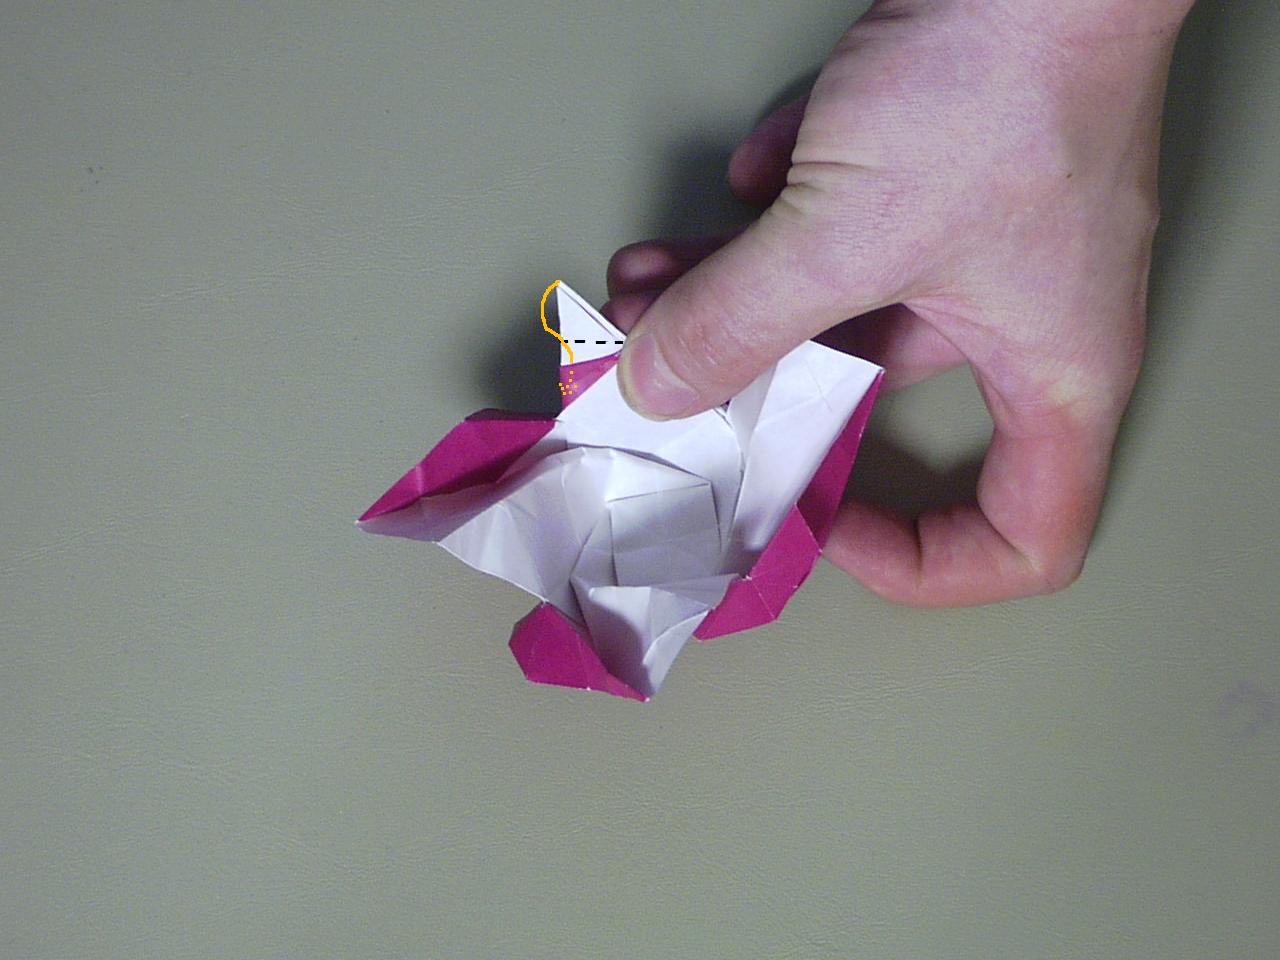 Step 20
After wrapping the red corner around the point there, you should see this. Take the point and fold it over and stuff it in the pocket as indicated by the orange arrow (see full size image for better view)
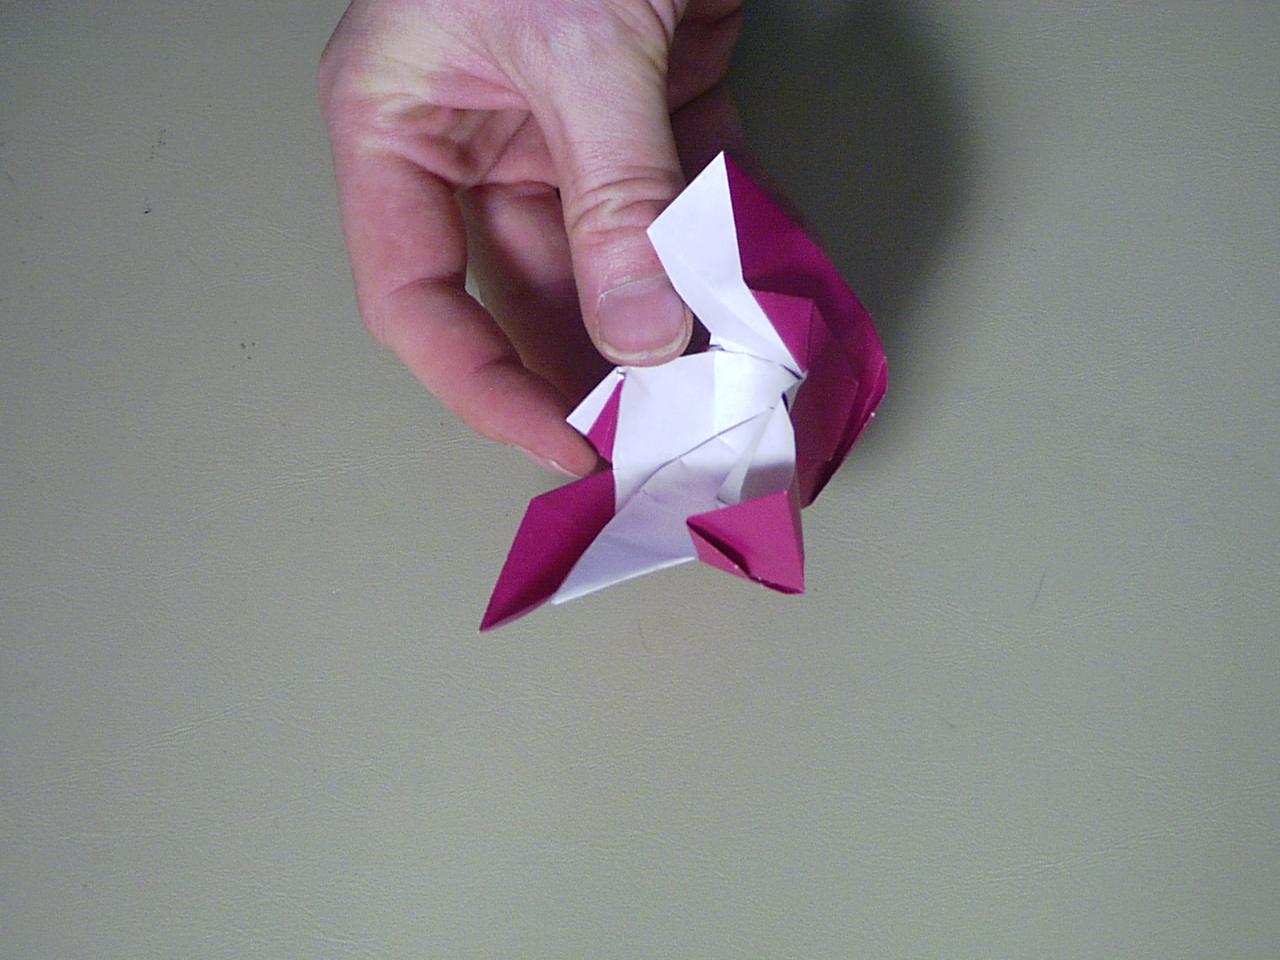 Step 20 - Result
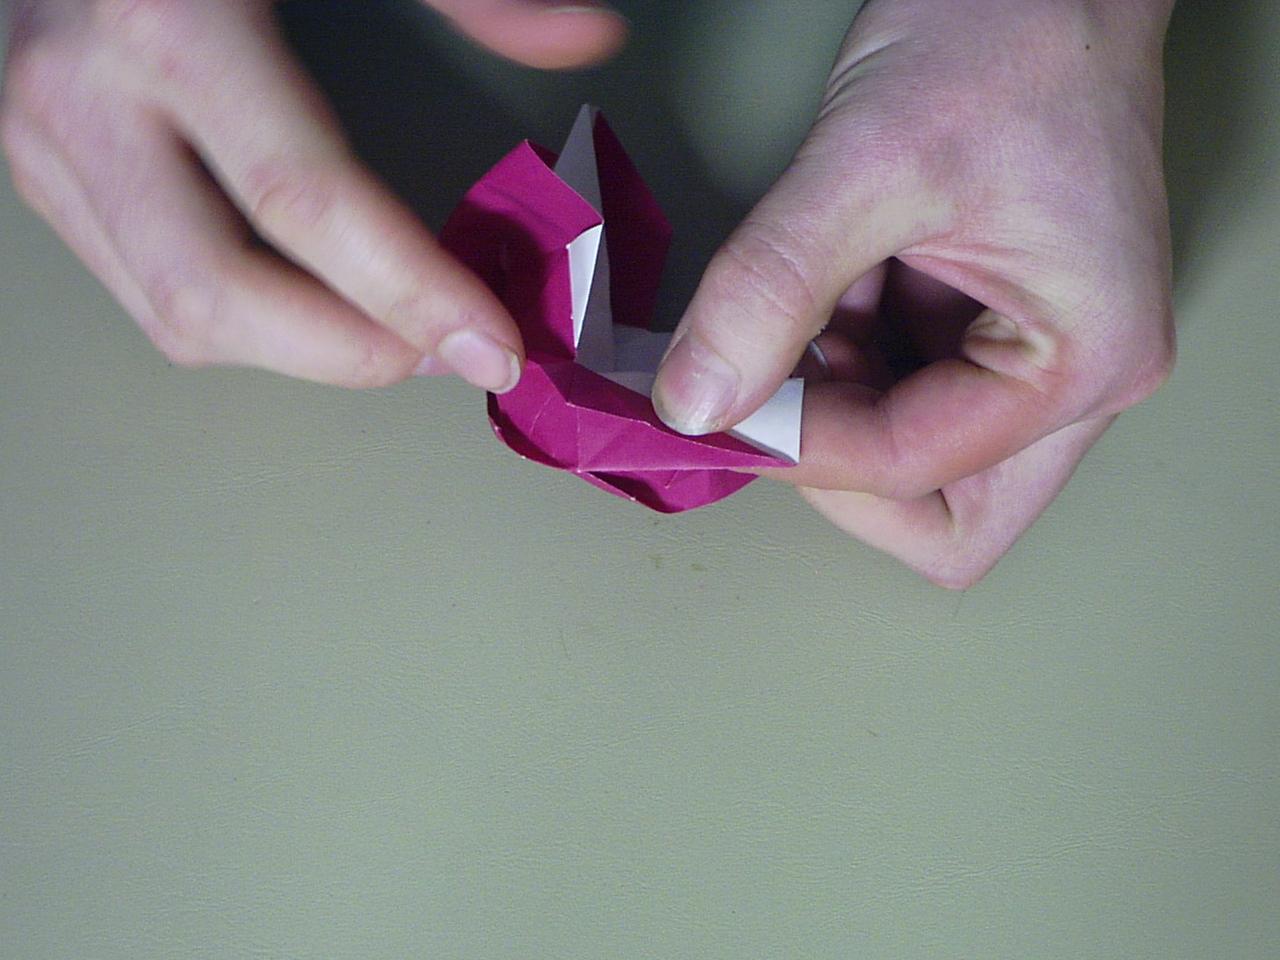
And you have a nice, squared off point. The reason I do it like that is because the base that I've designed fits much better when that point isn't so pointy.
 Step 21
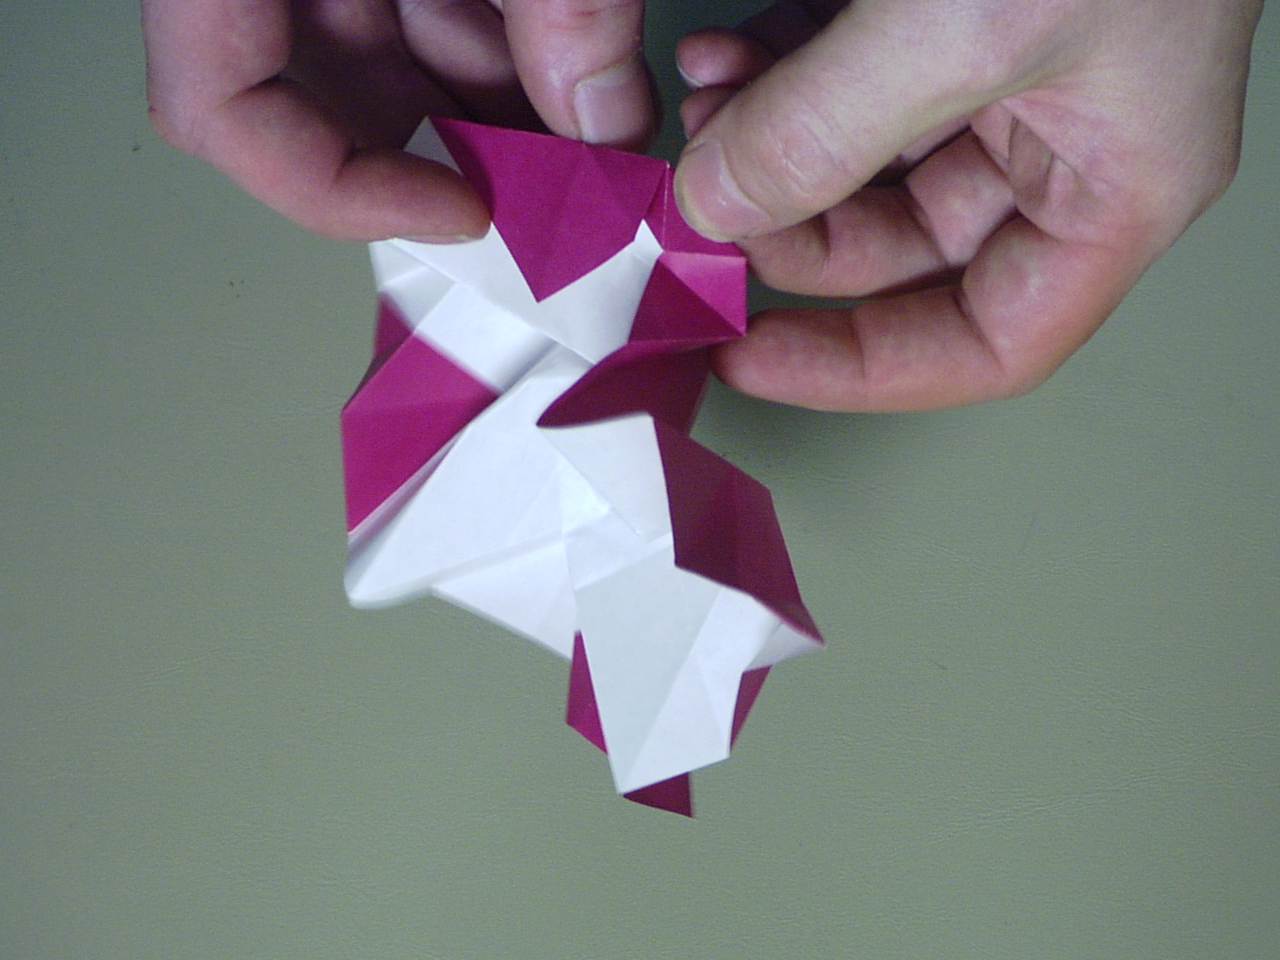
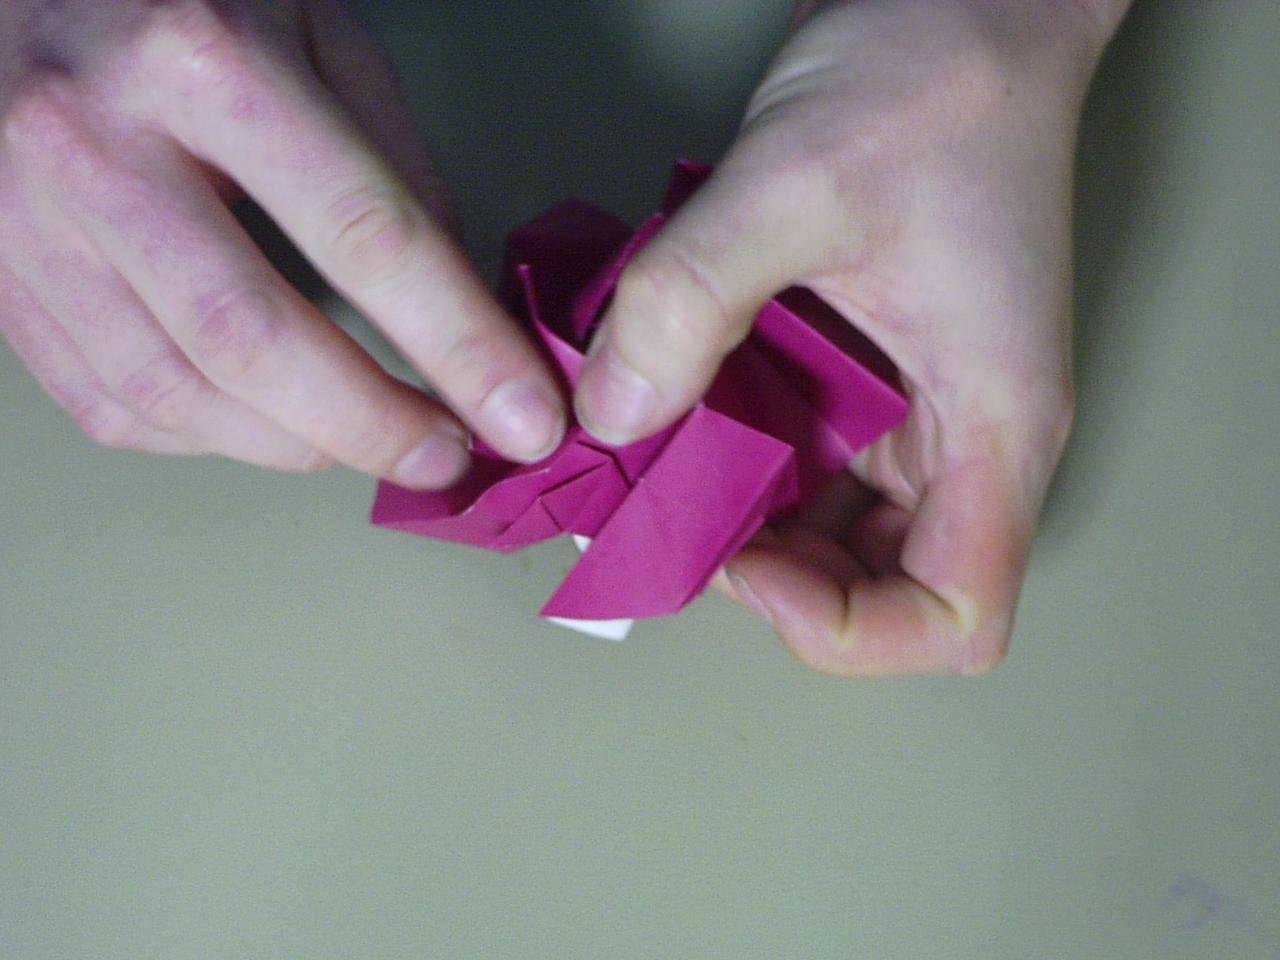
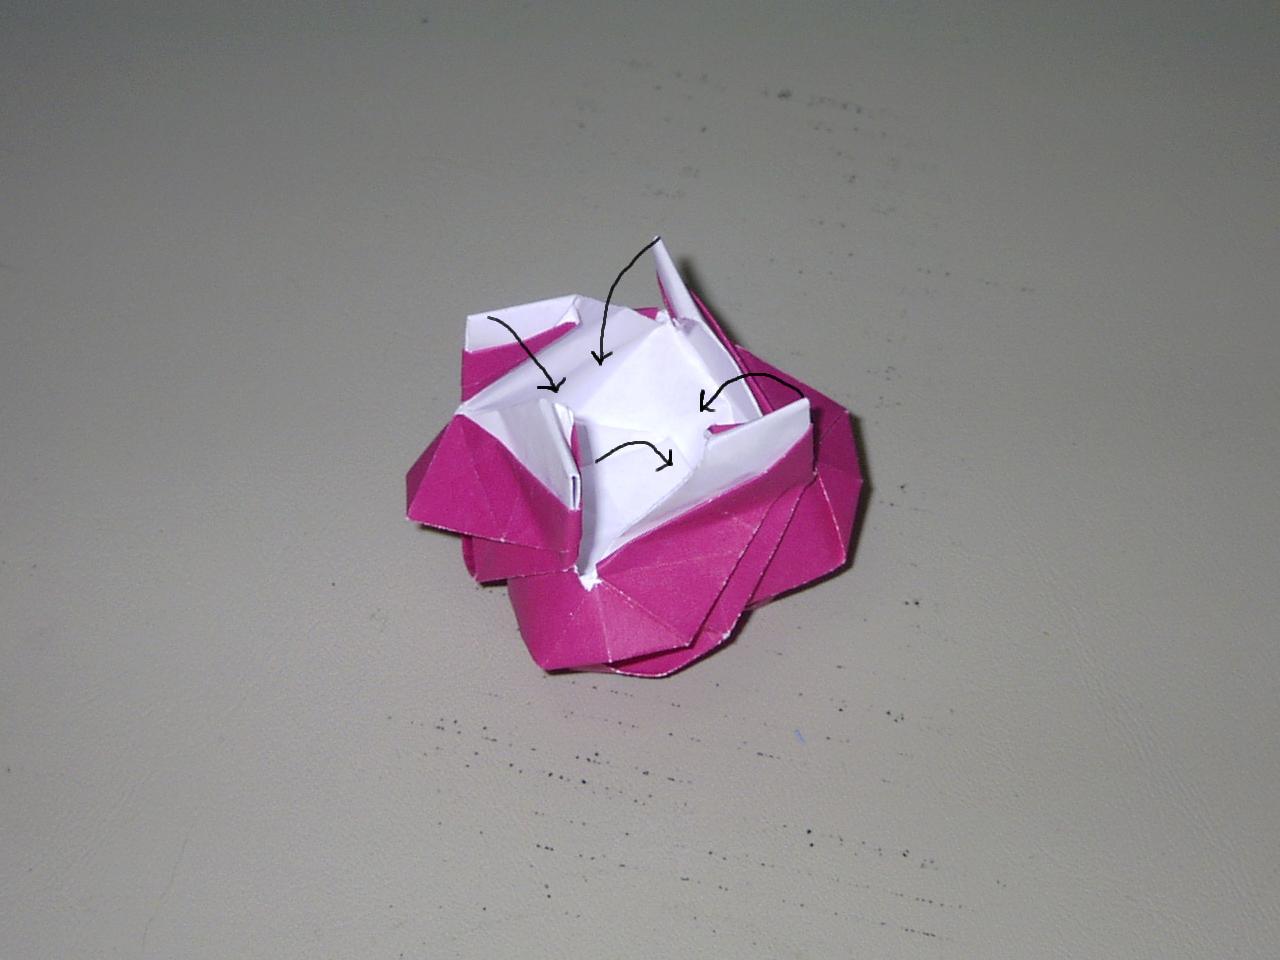
After repeating steps 18-20 on the other three points, it should look a lot like this. If you are planning to fold my base for the rose as well then I would reccomend stopping at this point because you'll just have to open it back up eventually anyway. If you just want the rose itself, then you can fold all four points down, tucking them under each other.
 Doing Step 21
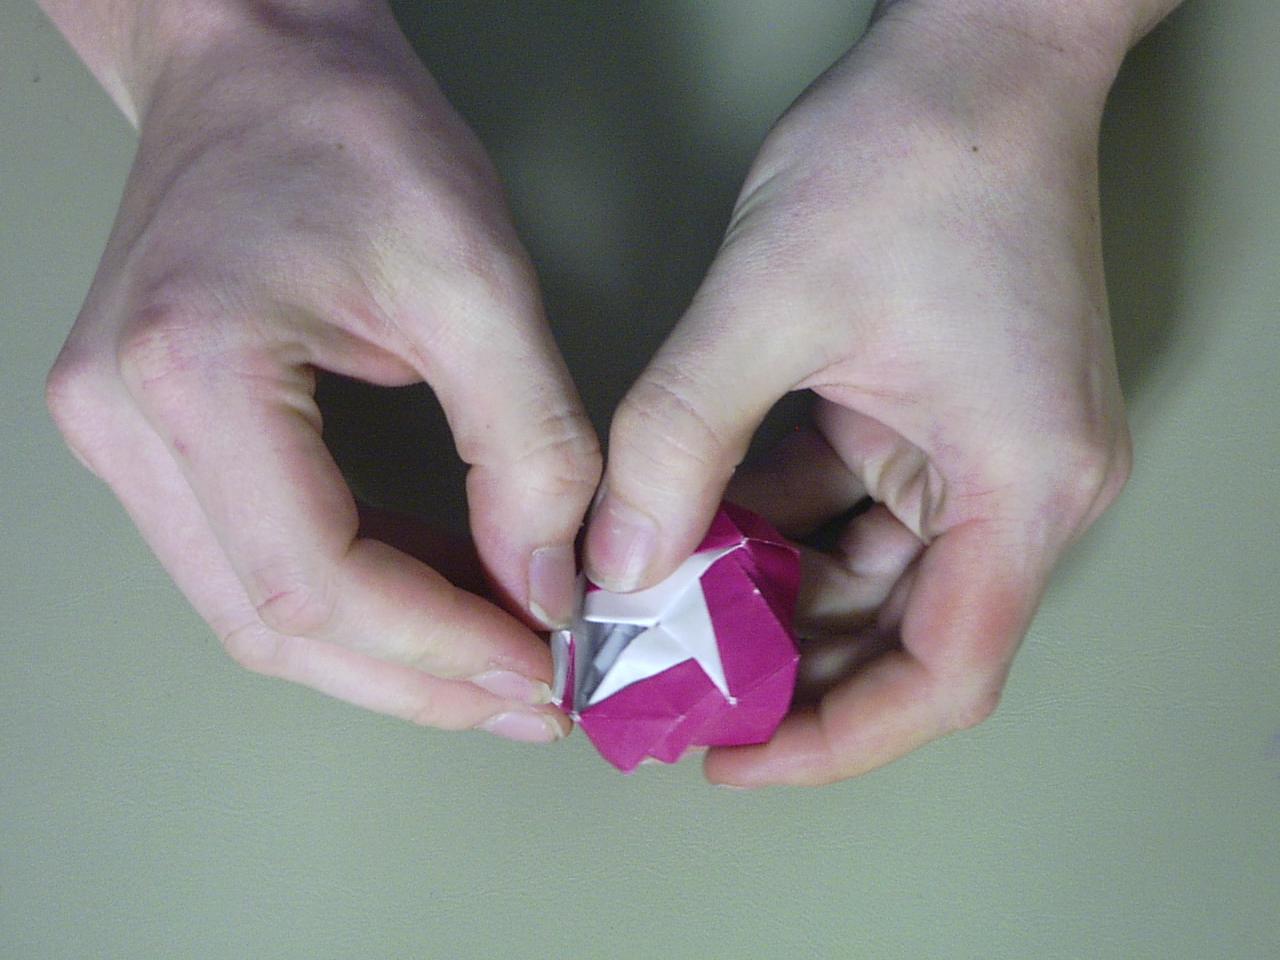
And here I go, tucking the last corner in like it was a box. In fact, there is a little bit of space inside once it's closed and if you're feeling so inclined, you could stuff a little treasure or something inside as a secret suprise...
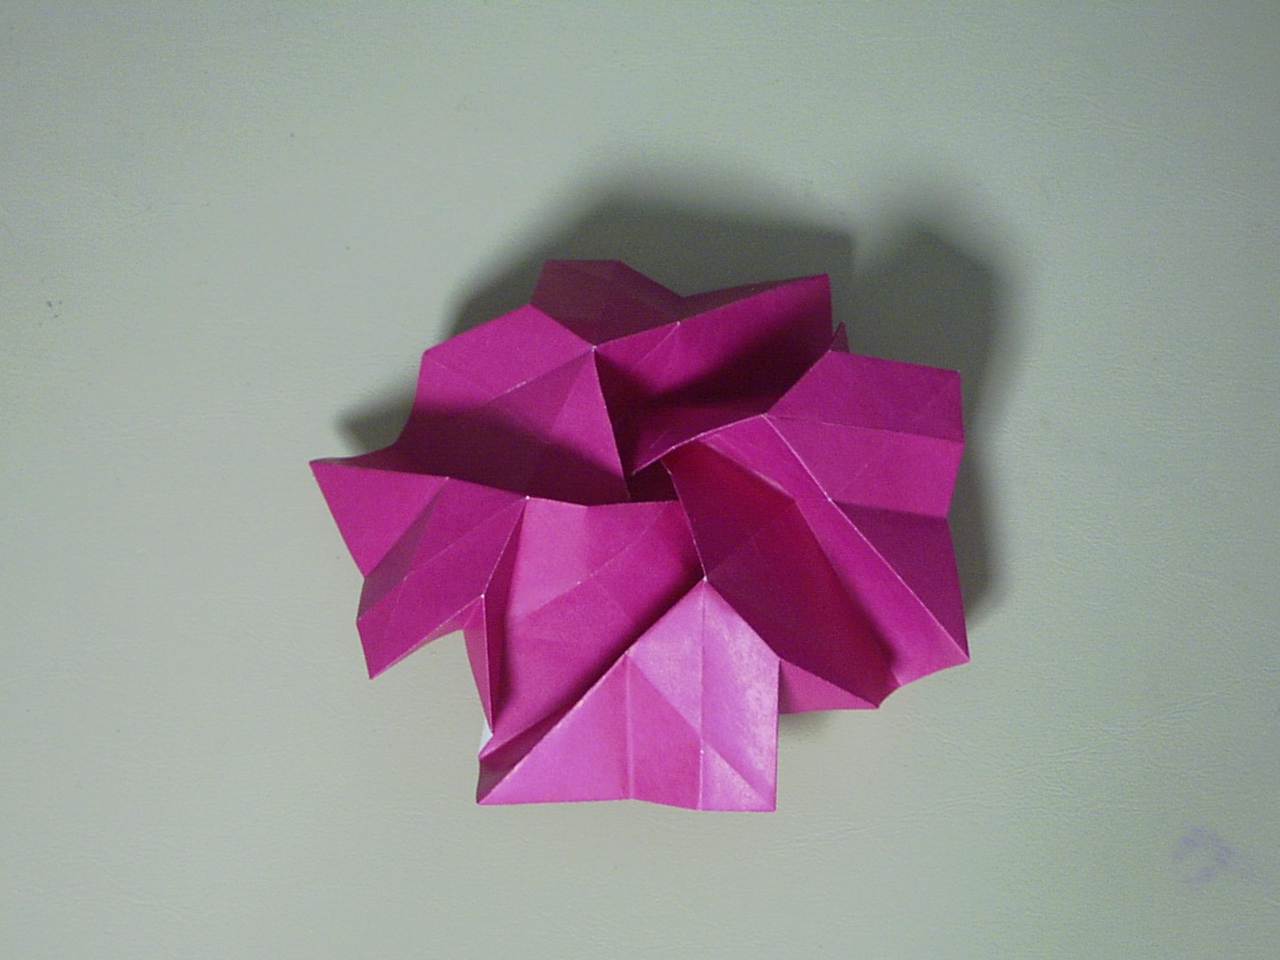
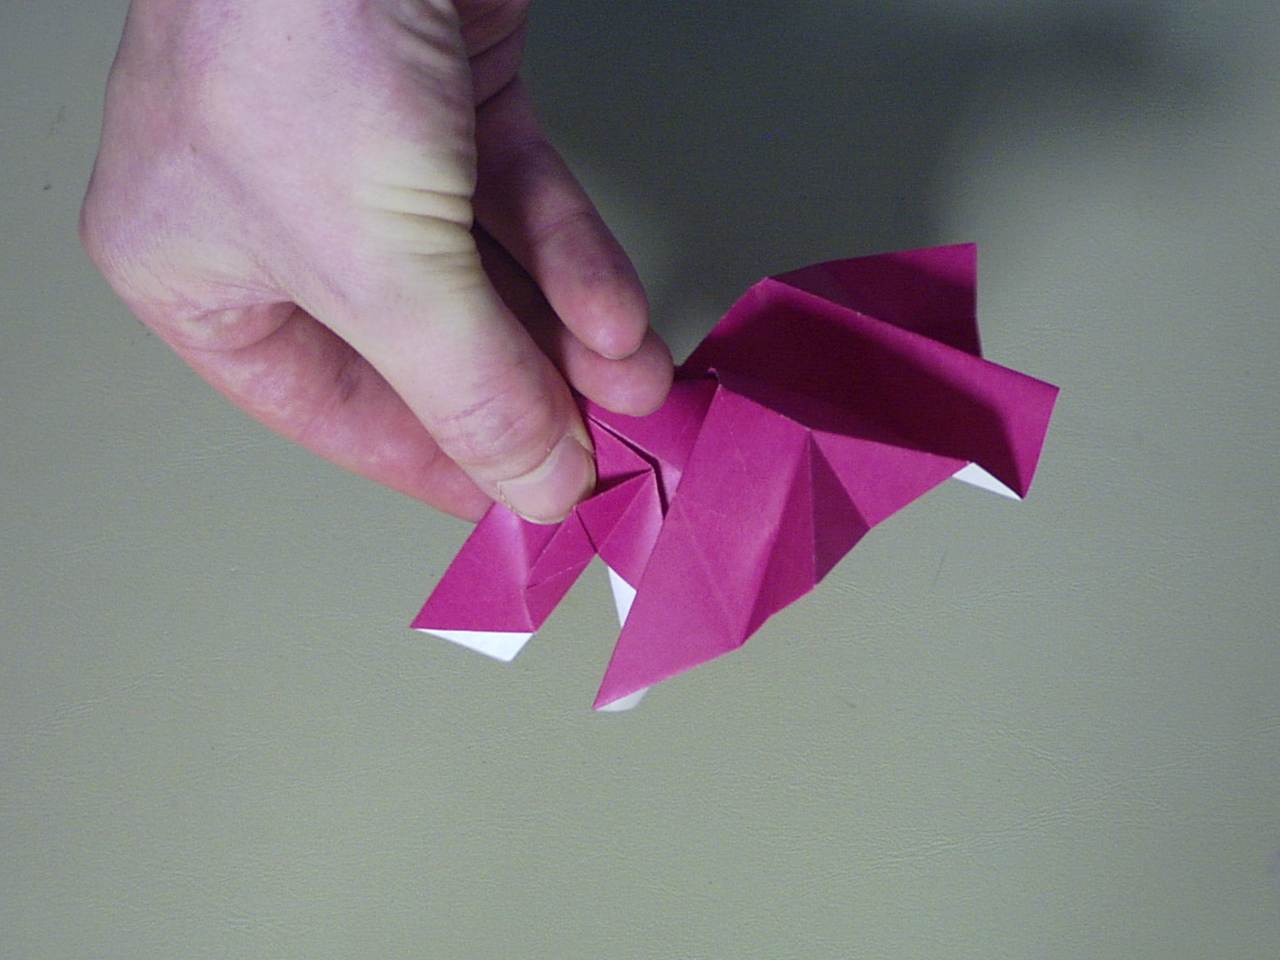
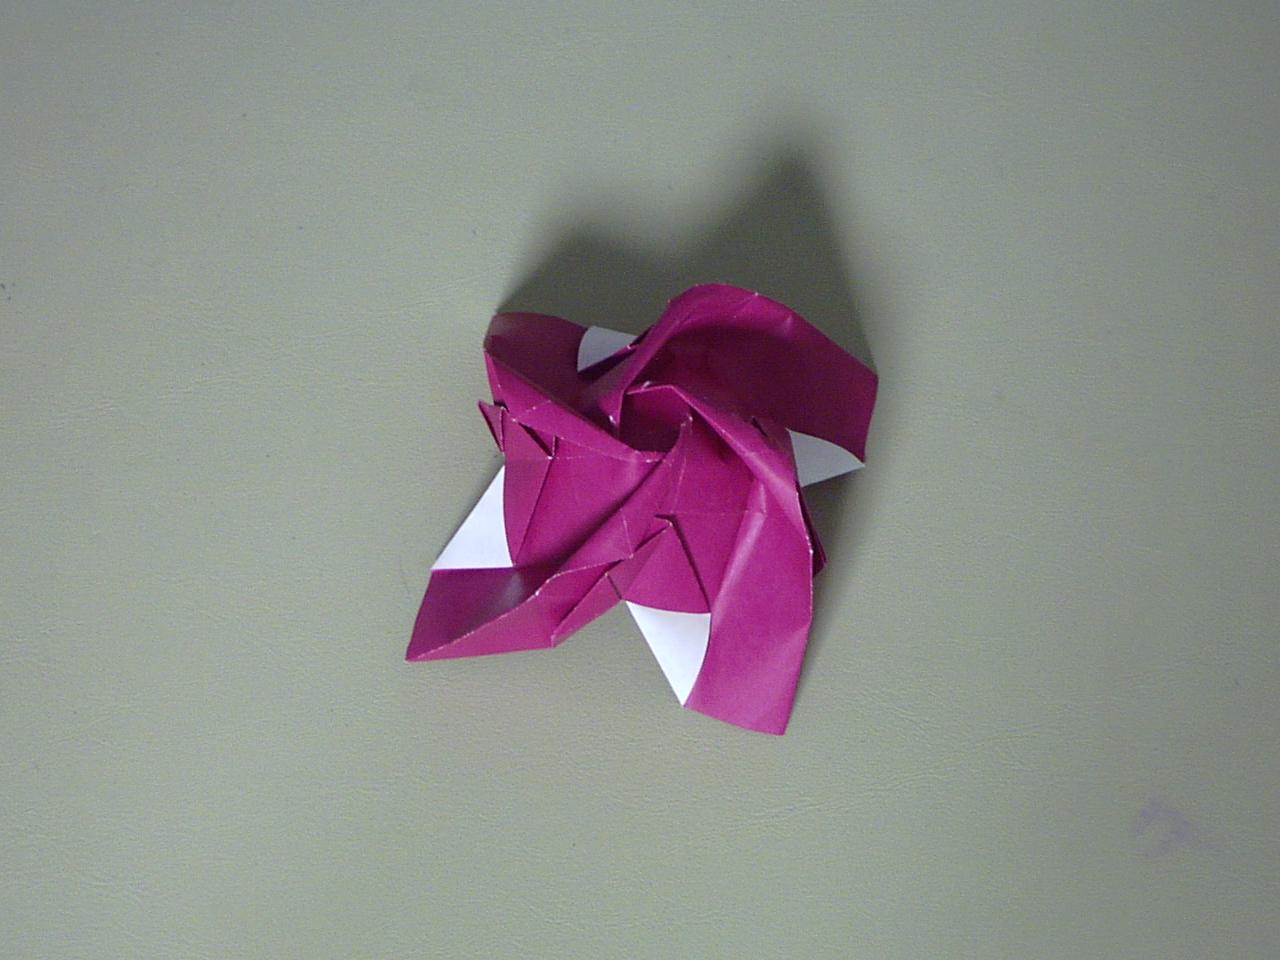
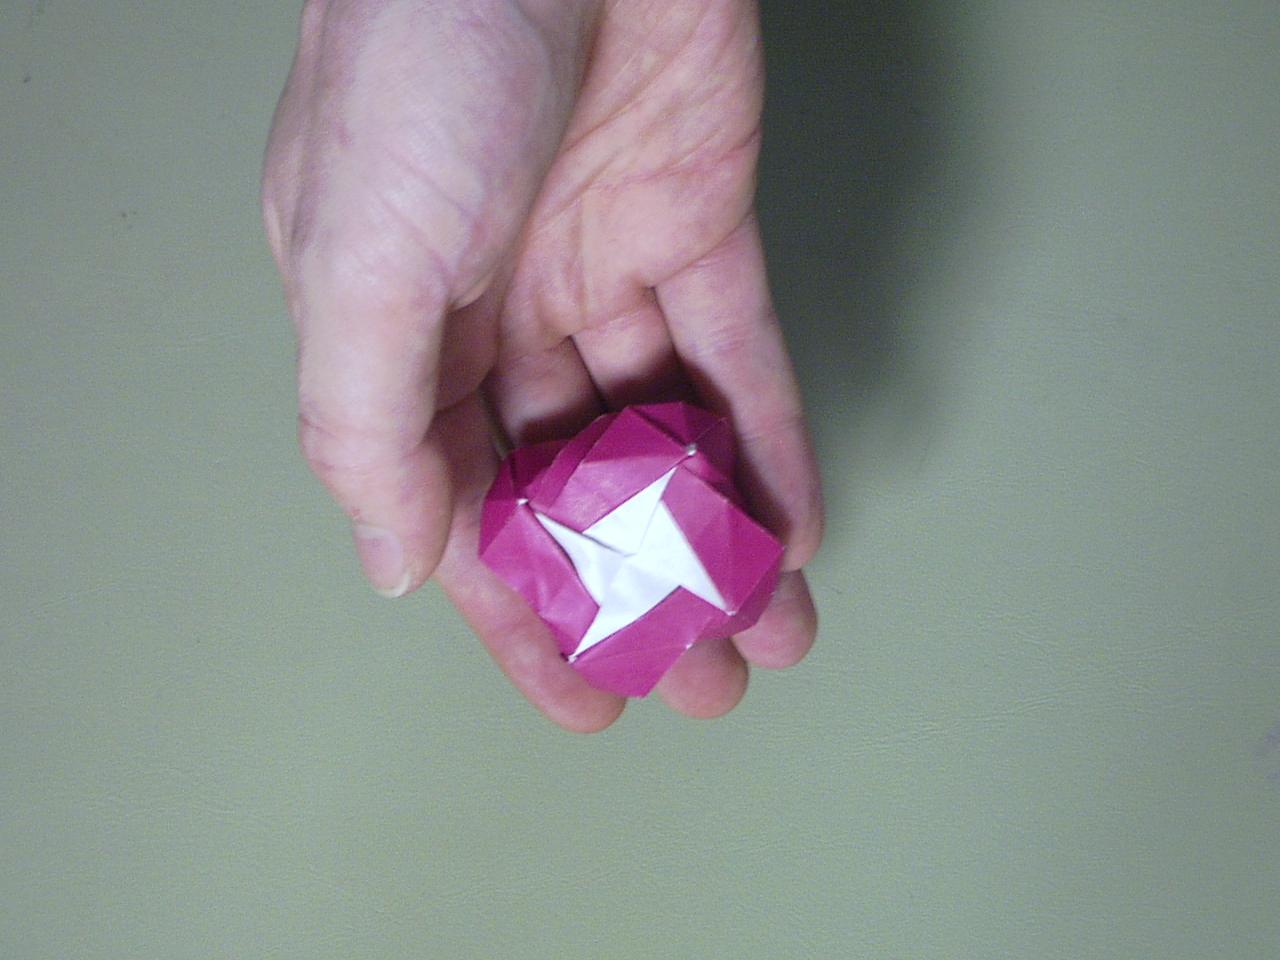 You're Done!
That wasn't so hard was it? Even if it was, it's well worth the effort. And don't worry if it doesn't turn out quite right the first few times you try to fold it... The more you fold, the easier it gets.
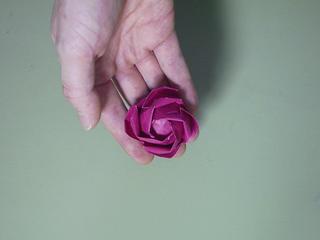
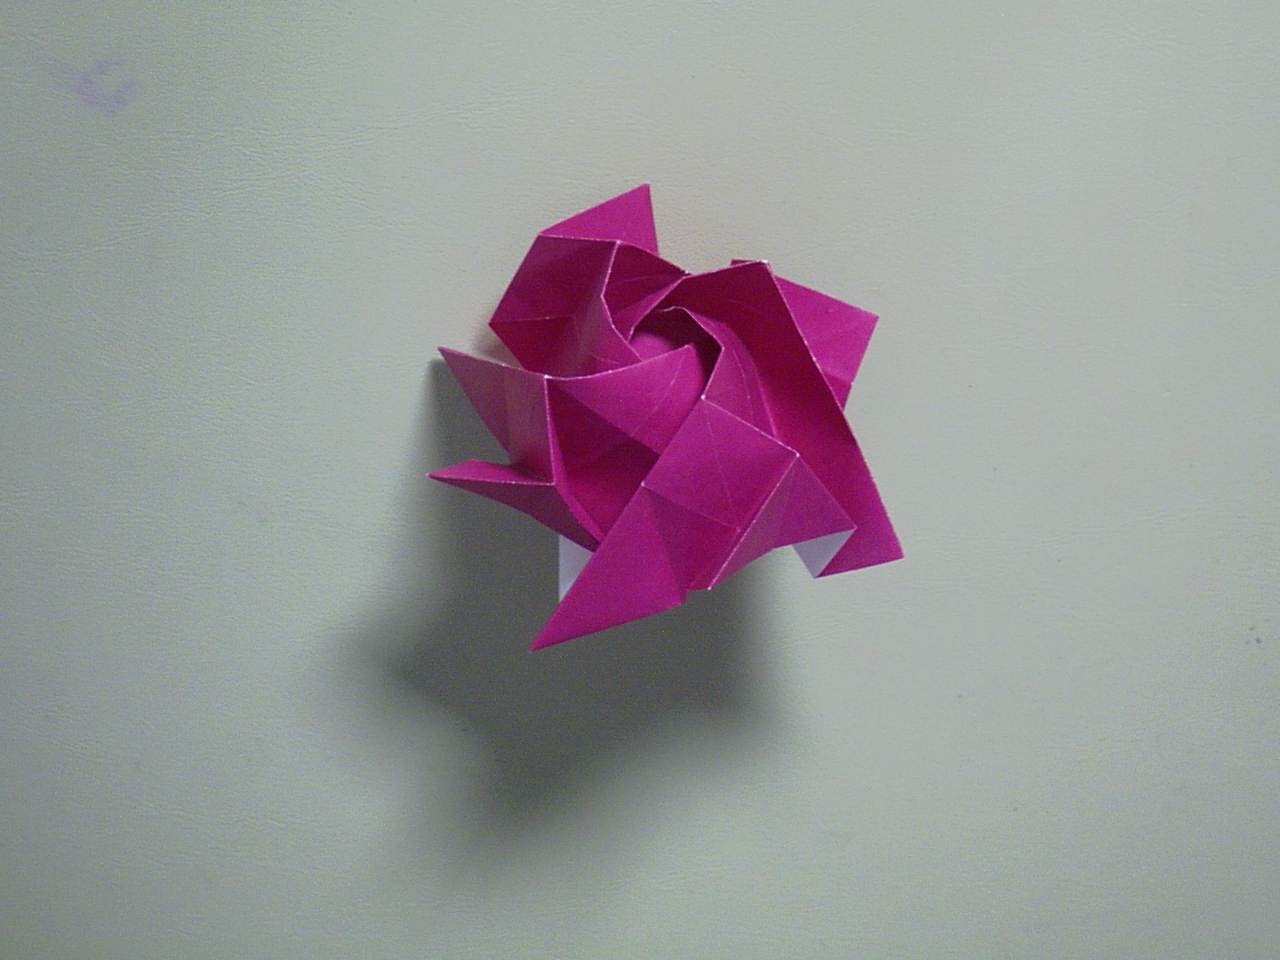
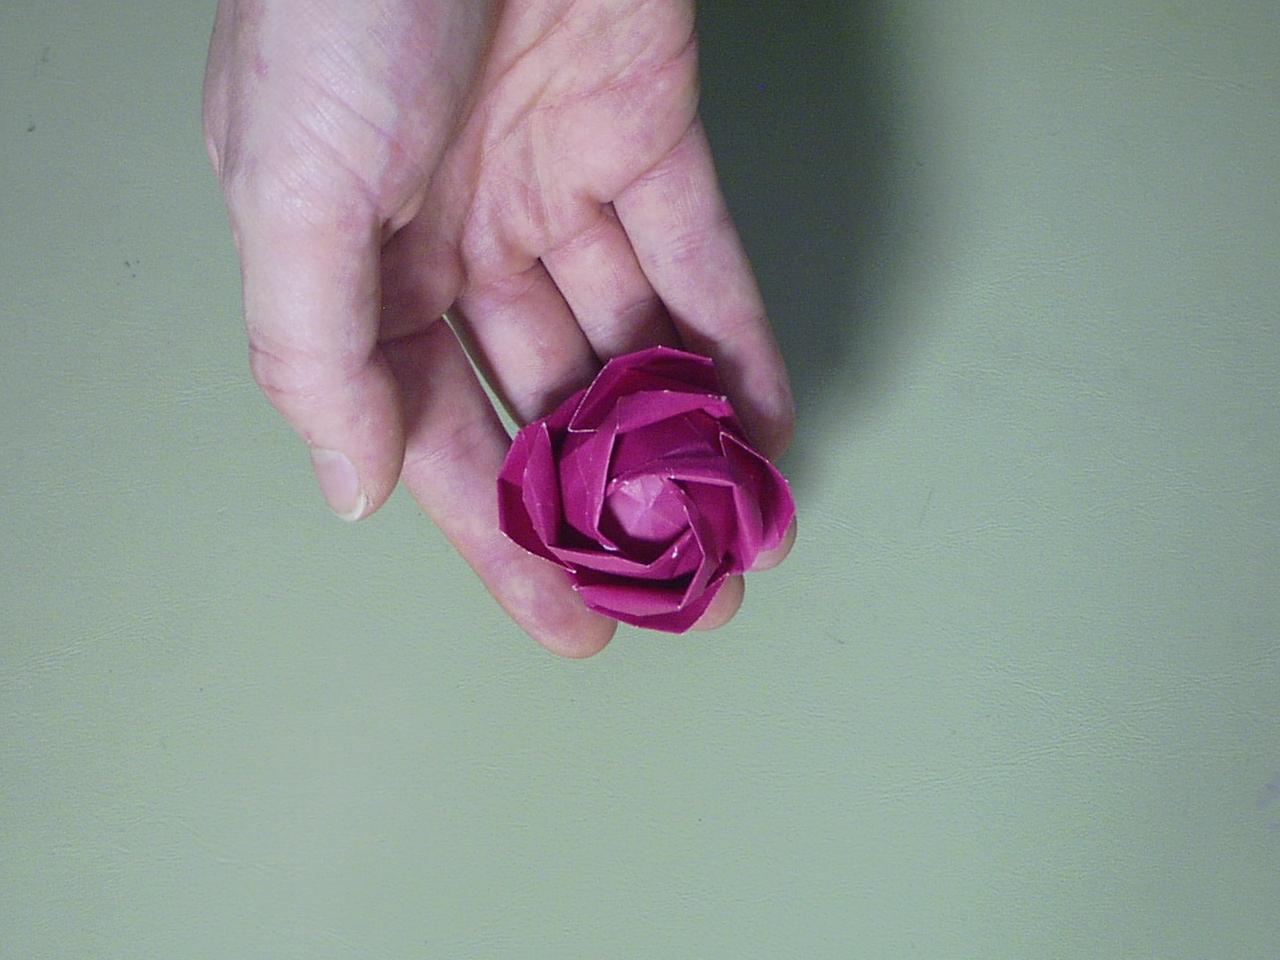 Isn't it pretty?
And your reward for all your time and effort is a lovely paper rose that will never wilt. And don't try to water it because it'll get moldy and that's not a good thing.